Kafka connect
In Console, the Kafka Connect page lets you stream data between Apache Kafka and other data systems in a reliable and scalable way. Conduktor provides a simple interface for managing all of your source and sink connectors in one place.
Kafka Connect cluster list
The Connect Cluster List is a summary view of all your configured Kafka Connect Clusters attached to your currently selected Kafka Cluster.
You can filter by Connect cluster name and order by:
- number of Connectors
- number of tasks
- connect cluster name
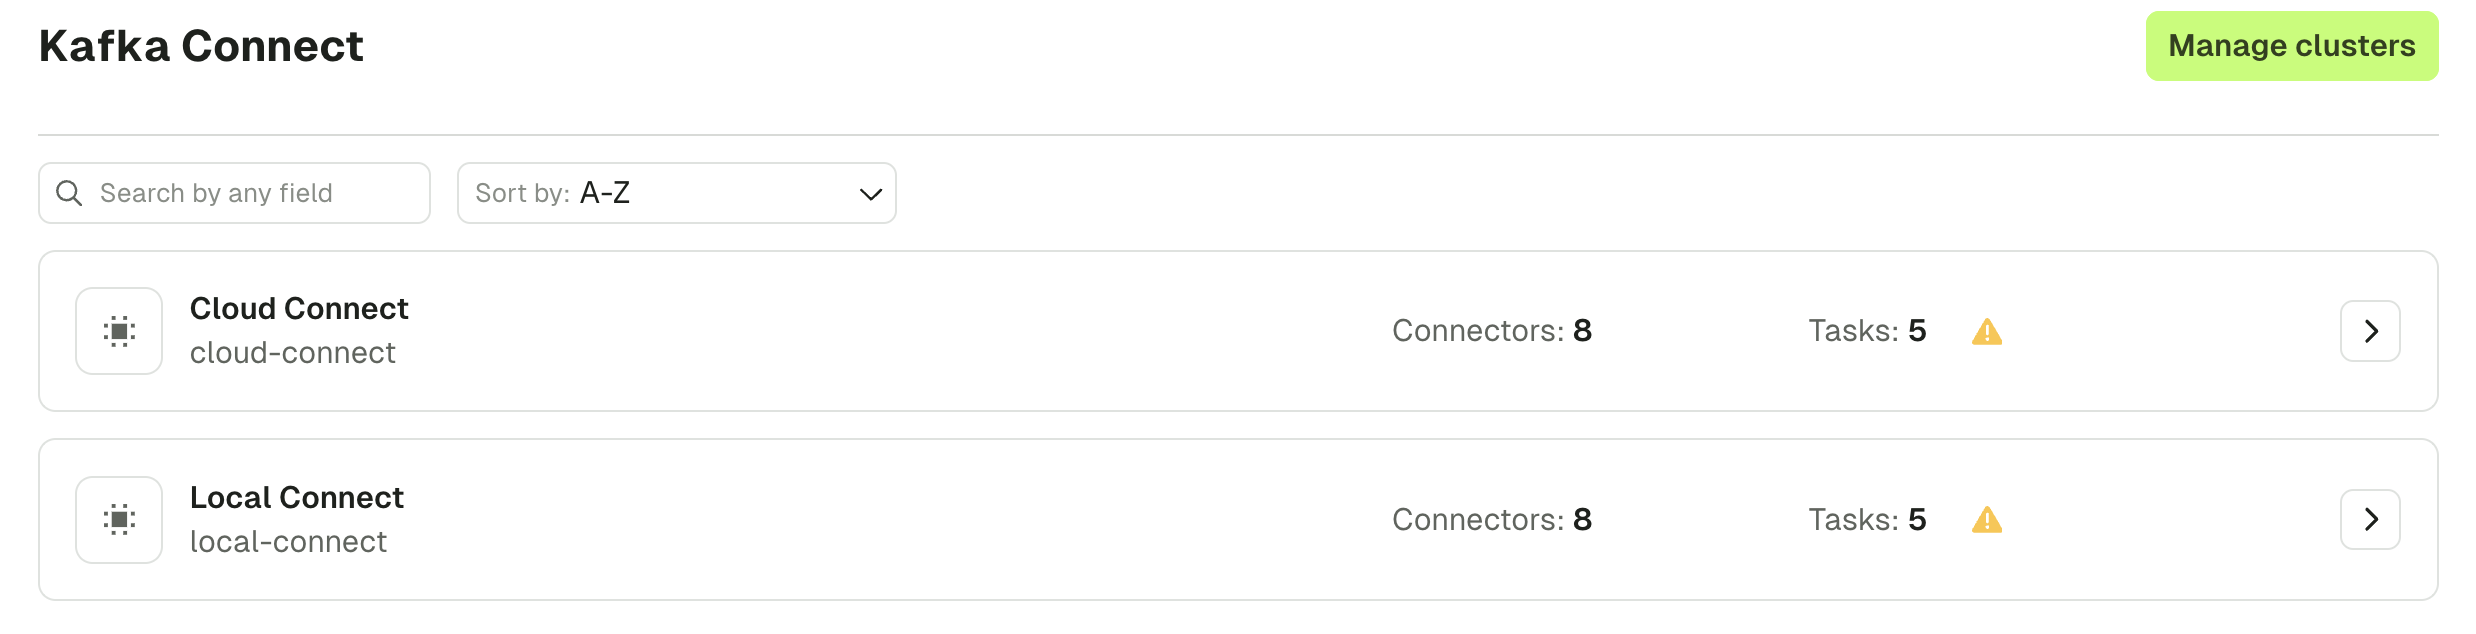
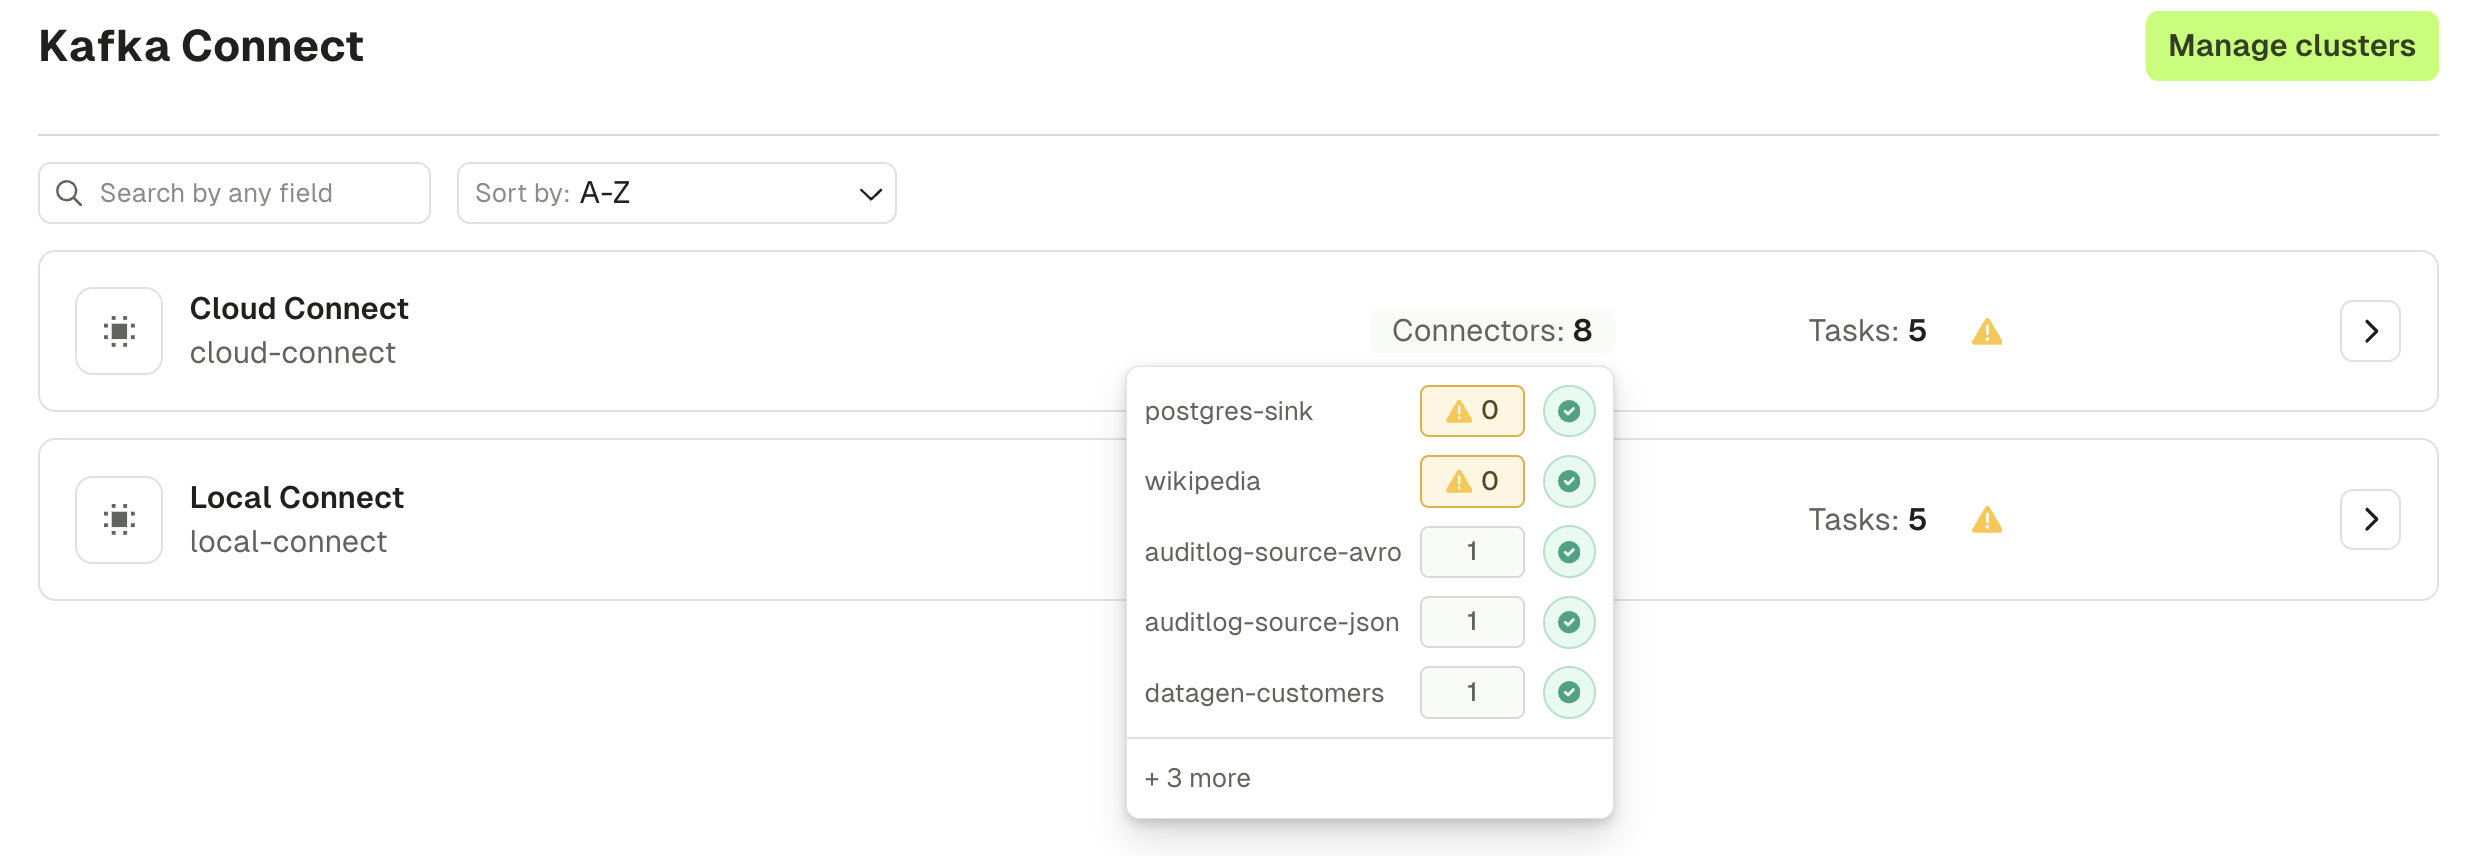
The list is warning you that some tasks have failed and gives you a high level overview by hovering over "Connectors".
Connector
The Connector list page lets you search for any Connector on your currently selected Kafka Connect cluster.
Configure RBAC to restrict your users to View, Browse, or perform any operation only to certain topics. Check the settings for details.
Multiple search capabilities can be combined to help you find the Connector you want faster.
Filtering is possible on:
- Connector name
- Connector class
- Connector type (source / sink)
- Connector status
Sorting is possible on all columns.
Active columns can be picked from a list of Available columns from the side button « ⚙️ Edit columns »
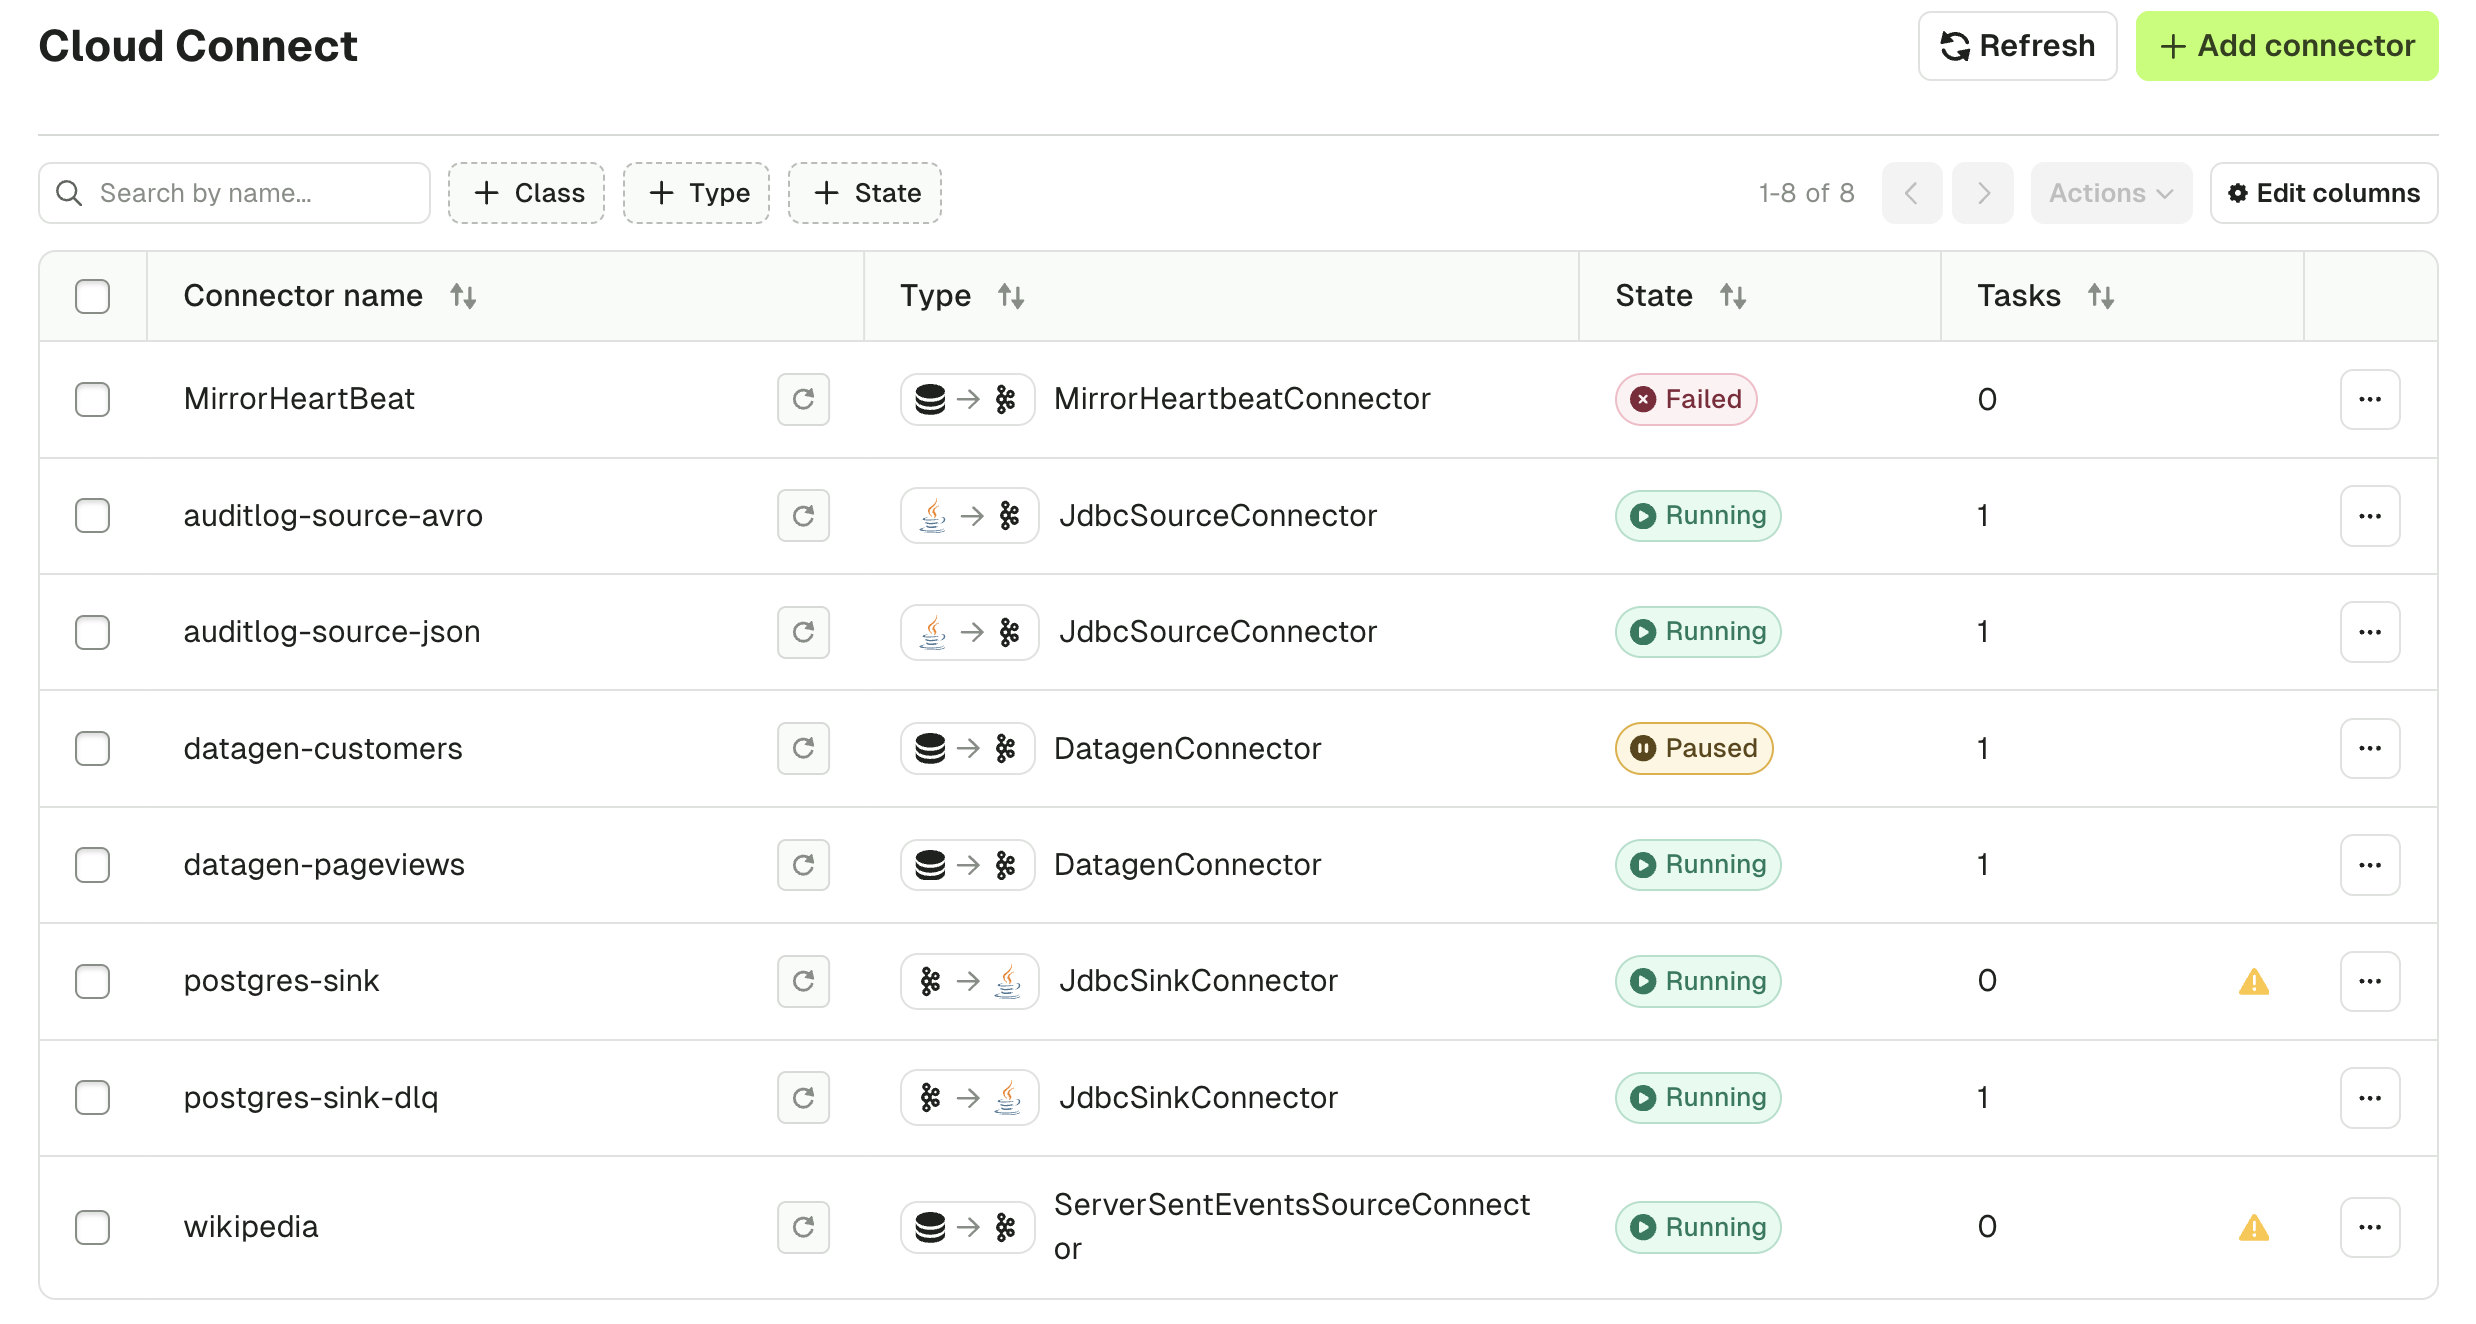
The round arrow icon next to the Connector name indicates whether the connector will be auto-restarted by Conduktor: (Grey: disabled, Green: enabled)
Clicking a Connector in the list brings you to the Connector overview page where you can perform further actions on the selected Connector:
- Review the Connector Task details and status
- View and Edit the Connector configuration
- Create and manage Alerts for this Connector
- Toggle Auto-restart feature
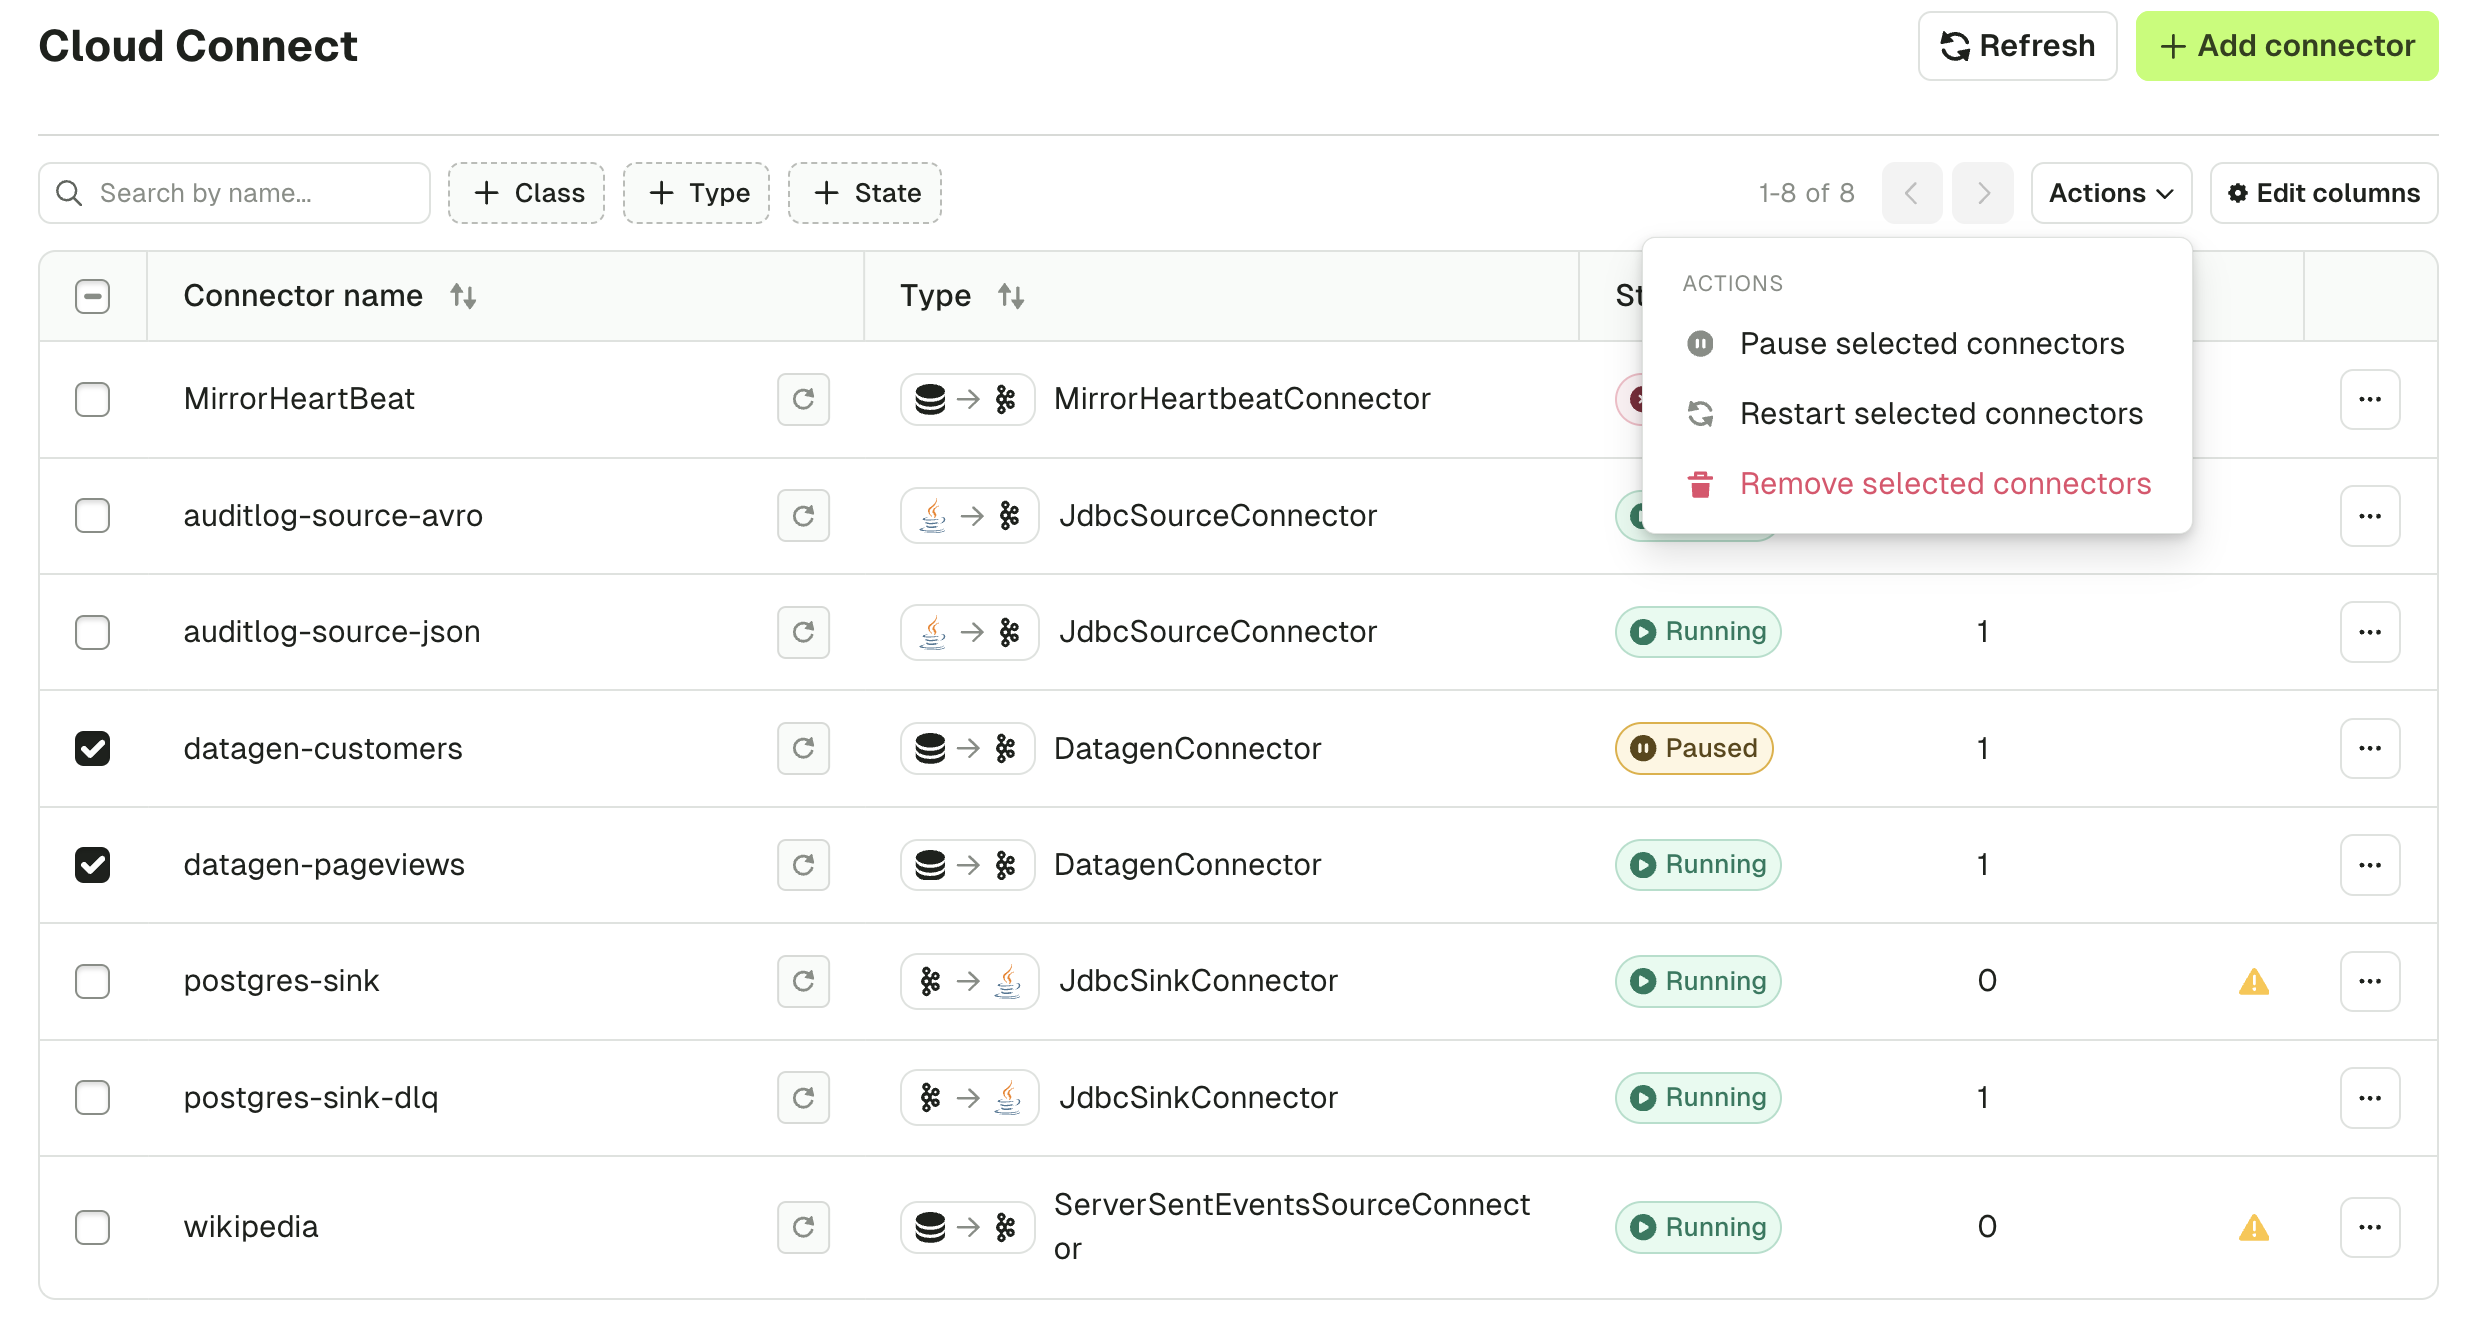
Several actions are also directly available from the Connectors list:
- Add a Connector
- Pause/Resume and Restart
- Delete Connector
All these operations can be applied either on a single Connector, or on multiple Connectors at once:
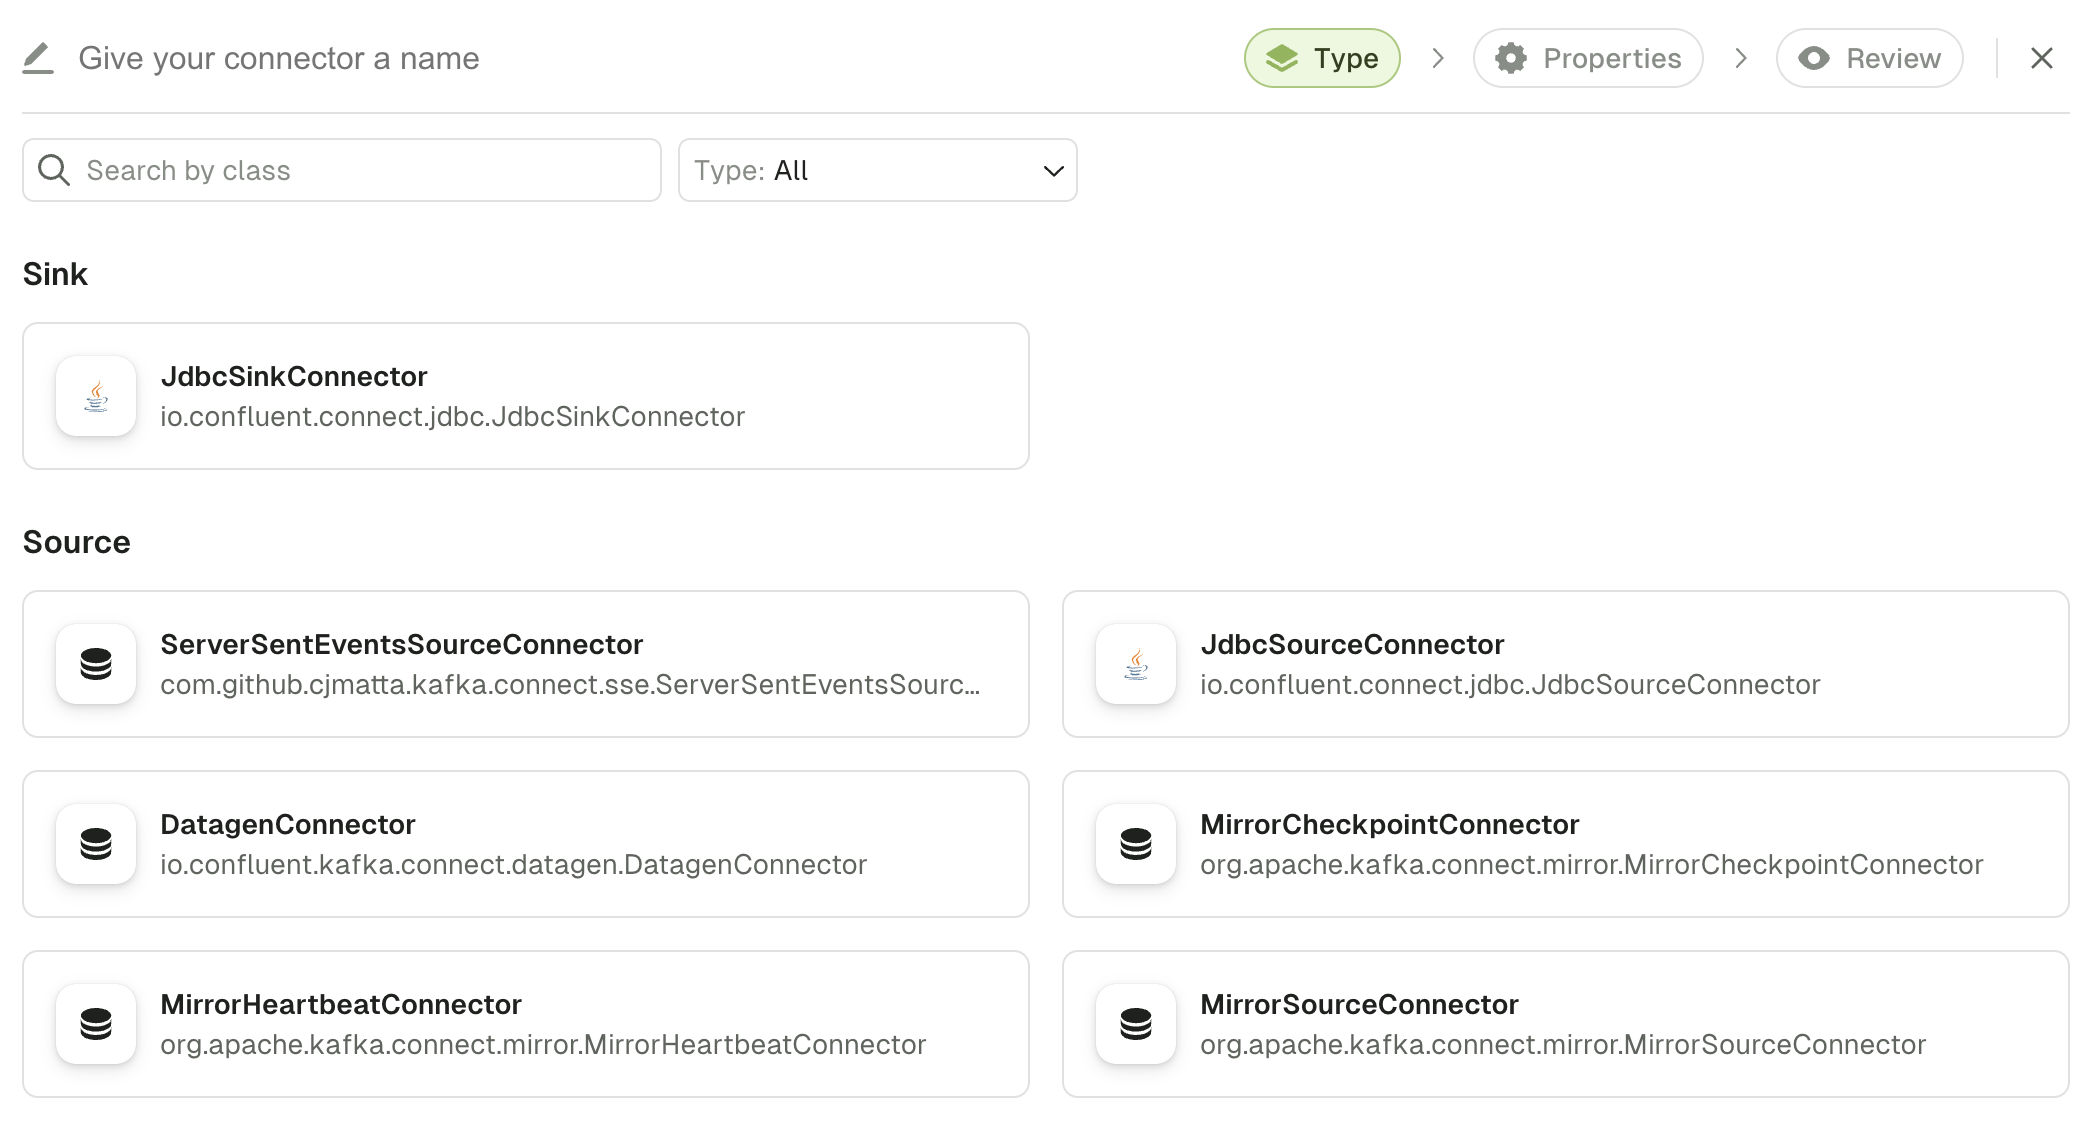
Add a Connector
To deploy a new Connector, click "Add a Connector". You will be see all the Connector Plugin classes installed on this Connect Cluster.
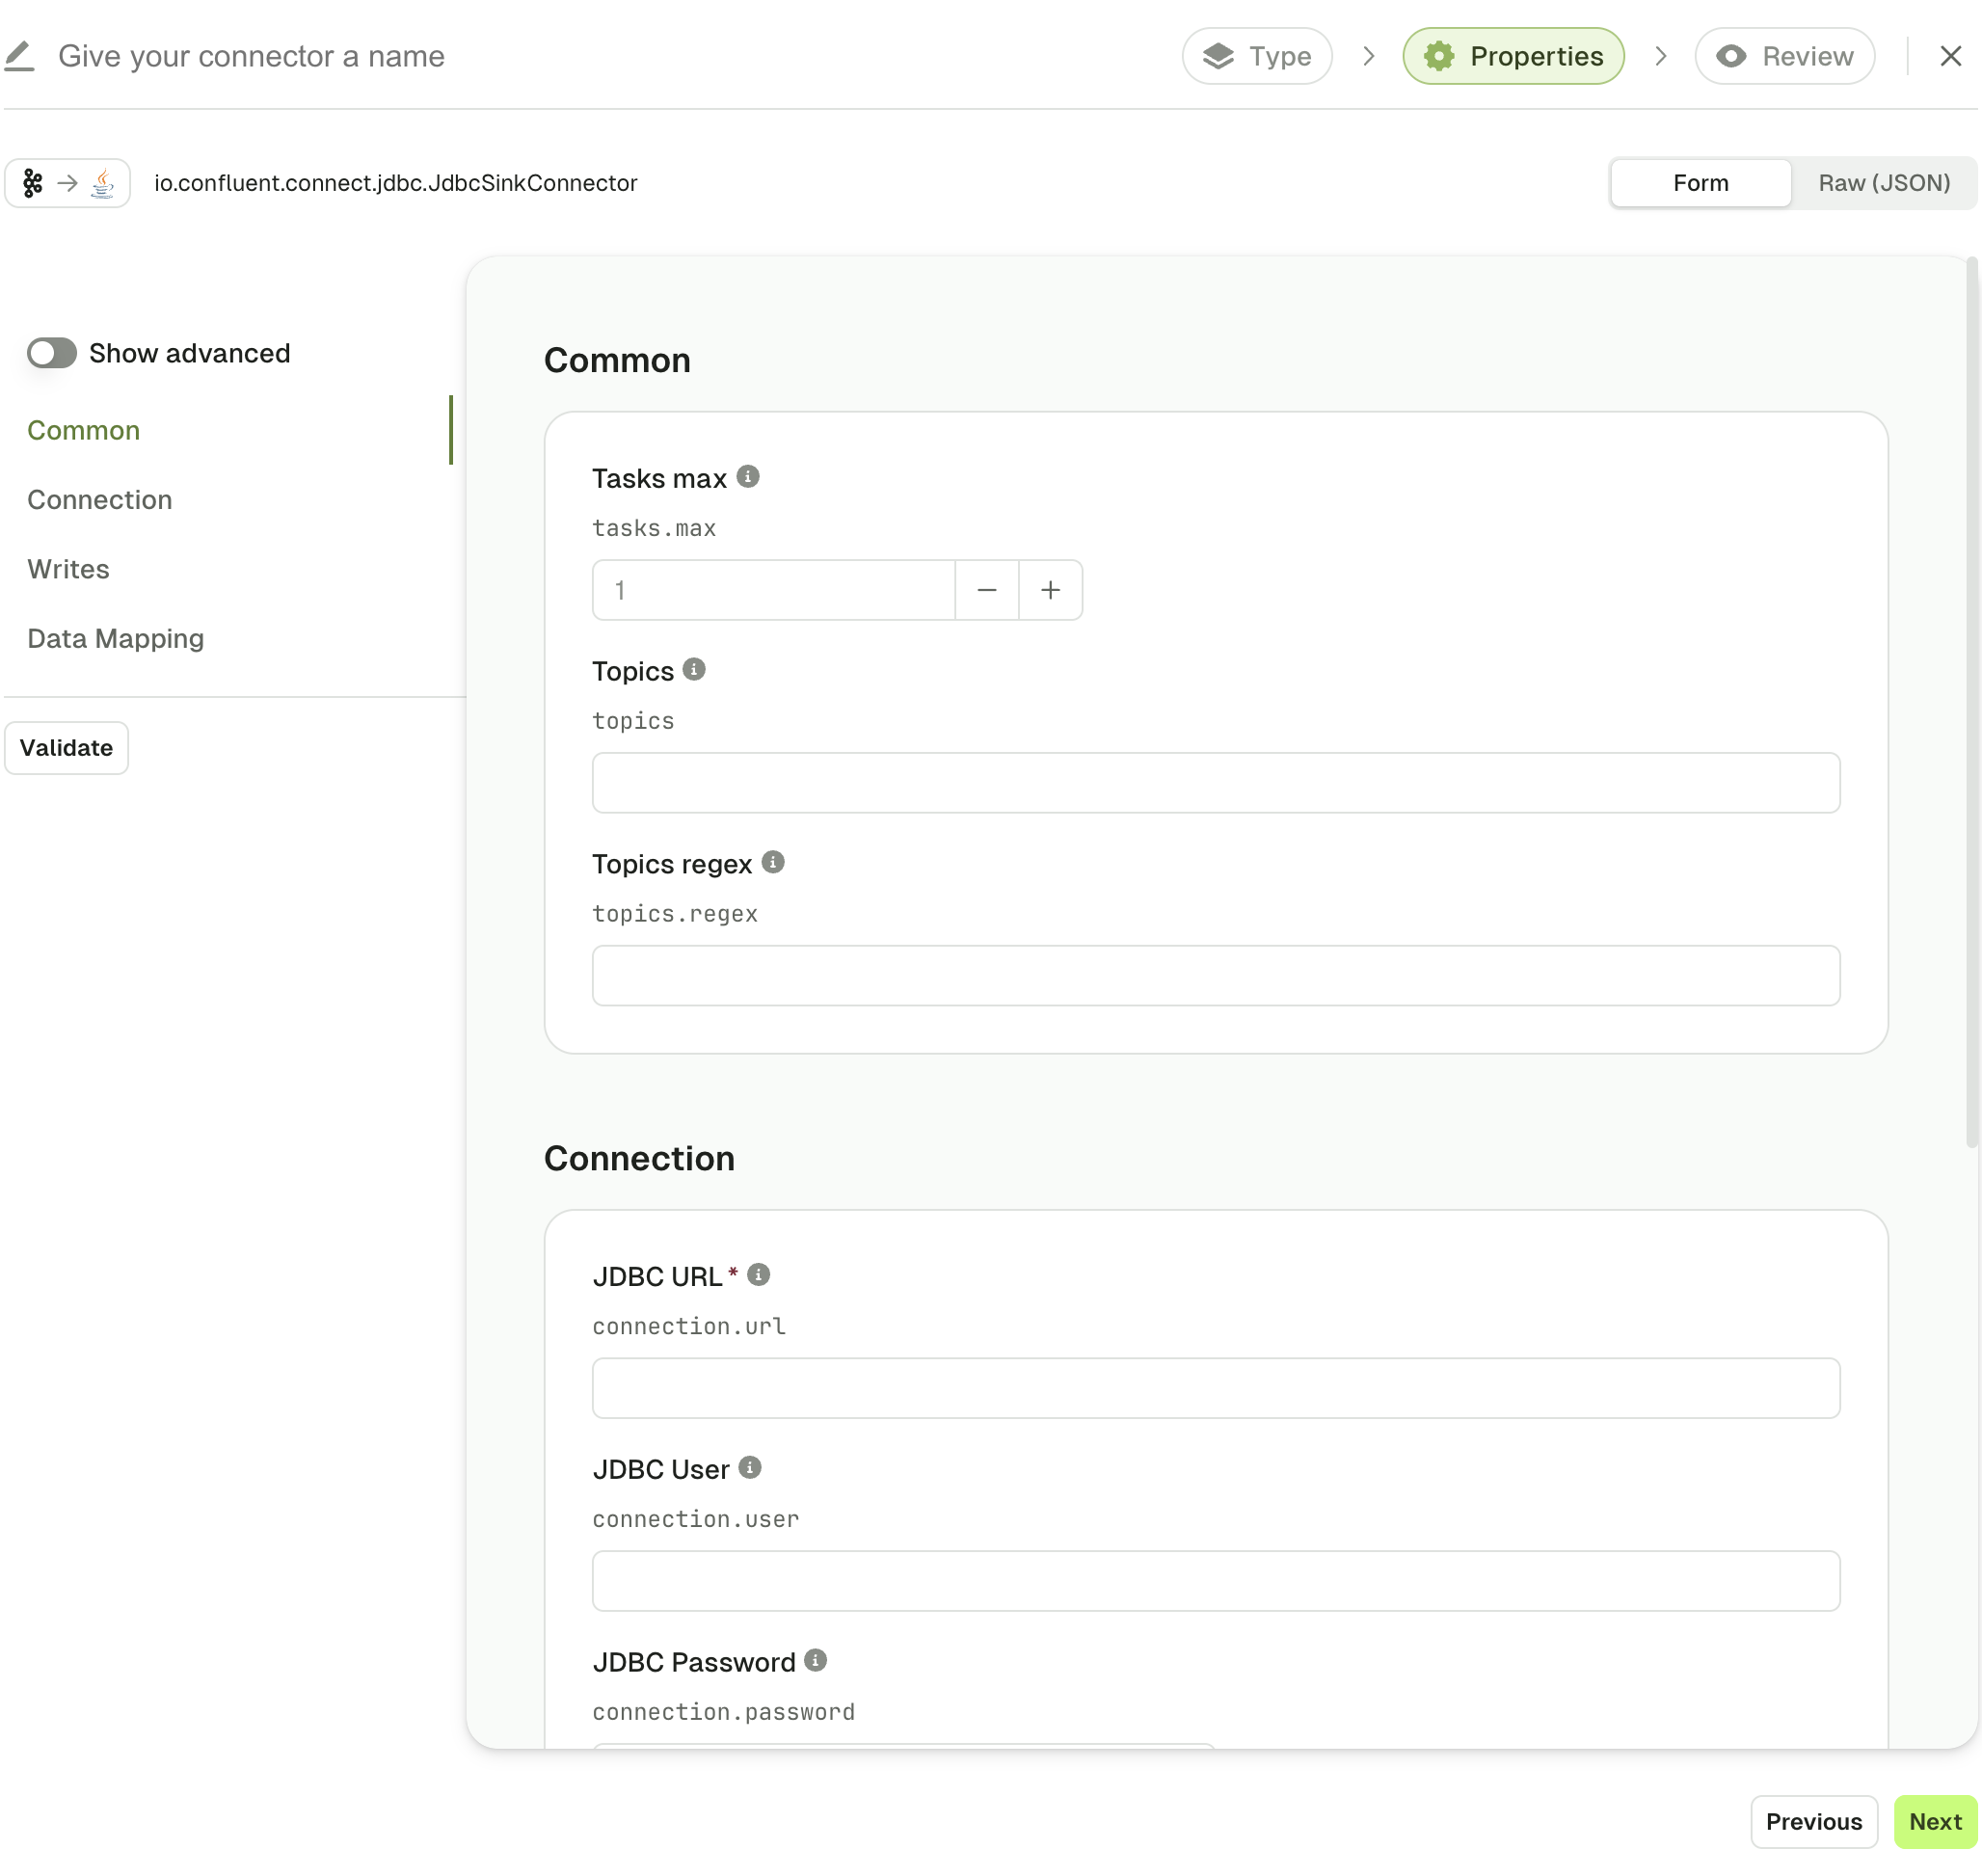
Next, you will get to our configuration wizard for Kafka Connect, which is taking full advantage of the Kafka Connect Validate API:
- A form is generated with structured configuration groups to be filled out
- Supportive error handling is included with each individual field
- Embedded documentation helps you understand which fields are required and what their expected, and default, values are
- Toggle advanced configuration to visualize only the most important fields
- Switch seamlessly between Form View and JSON View at any time
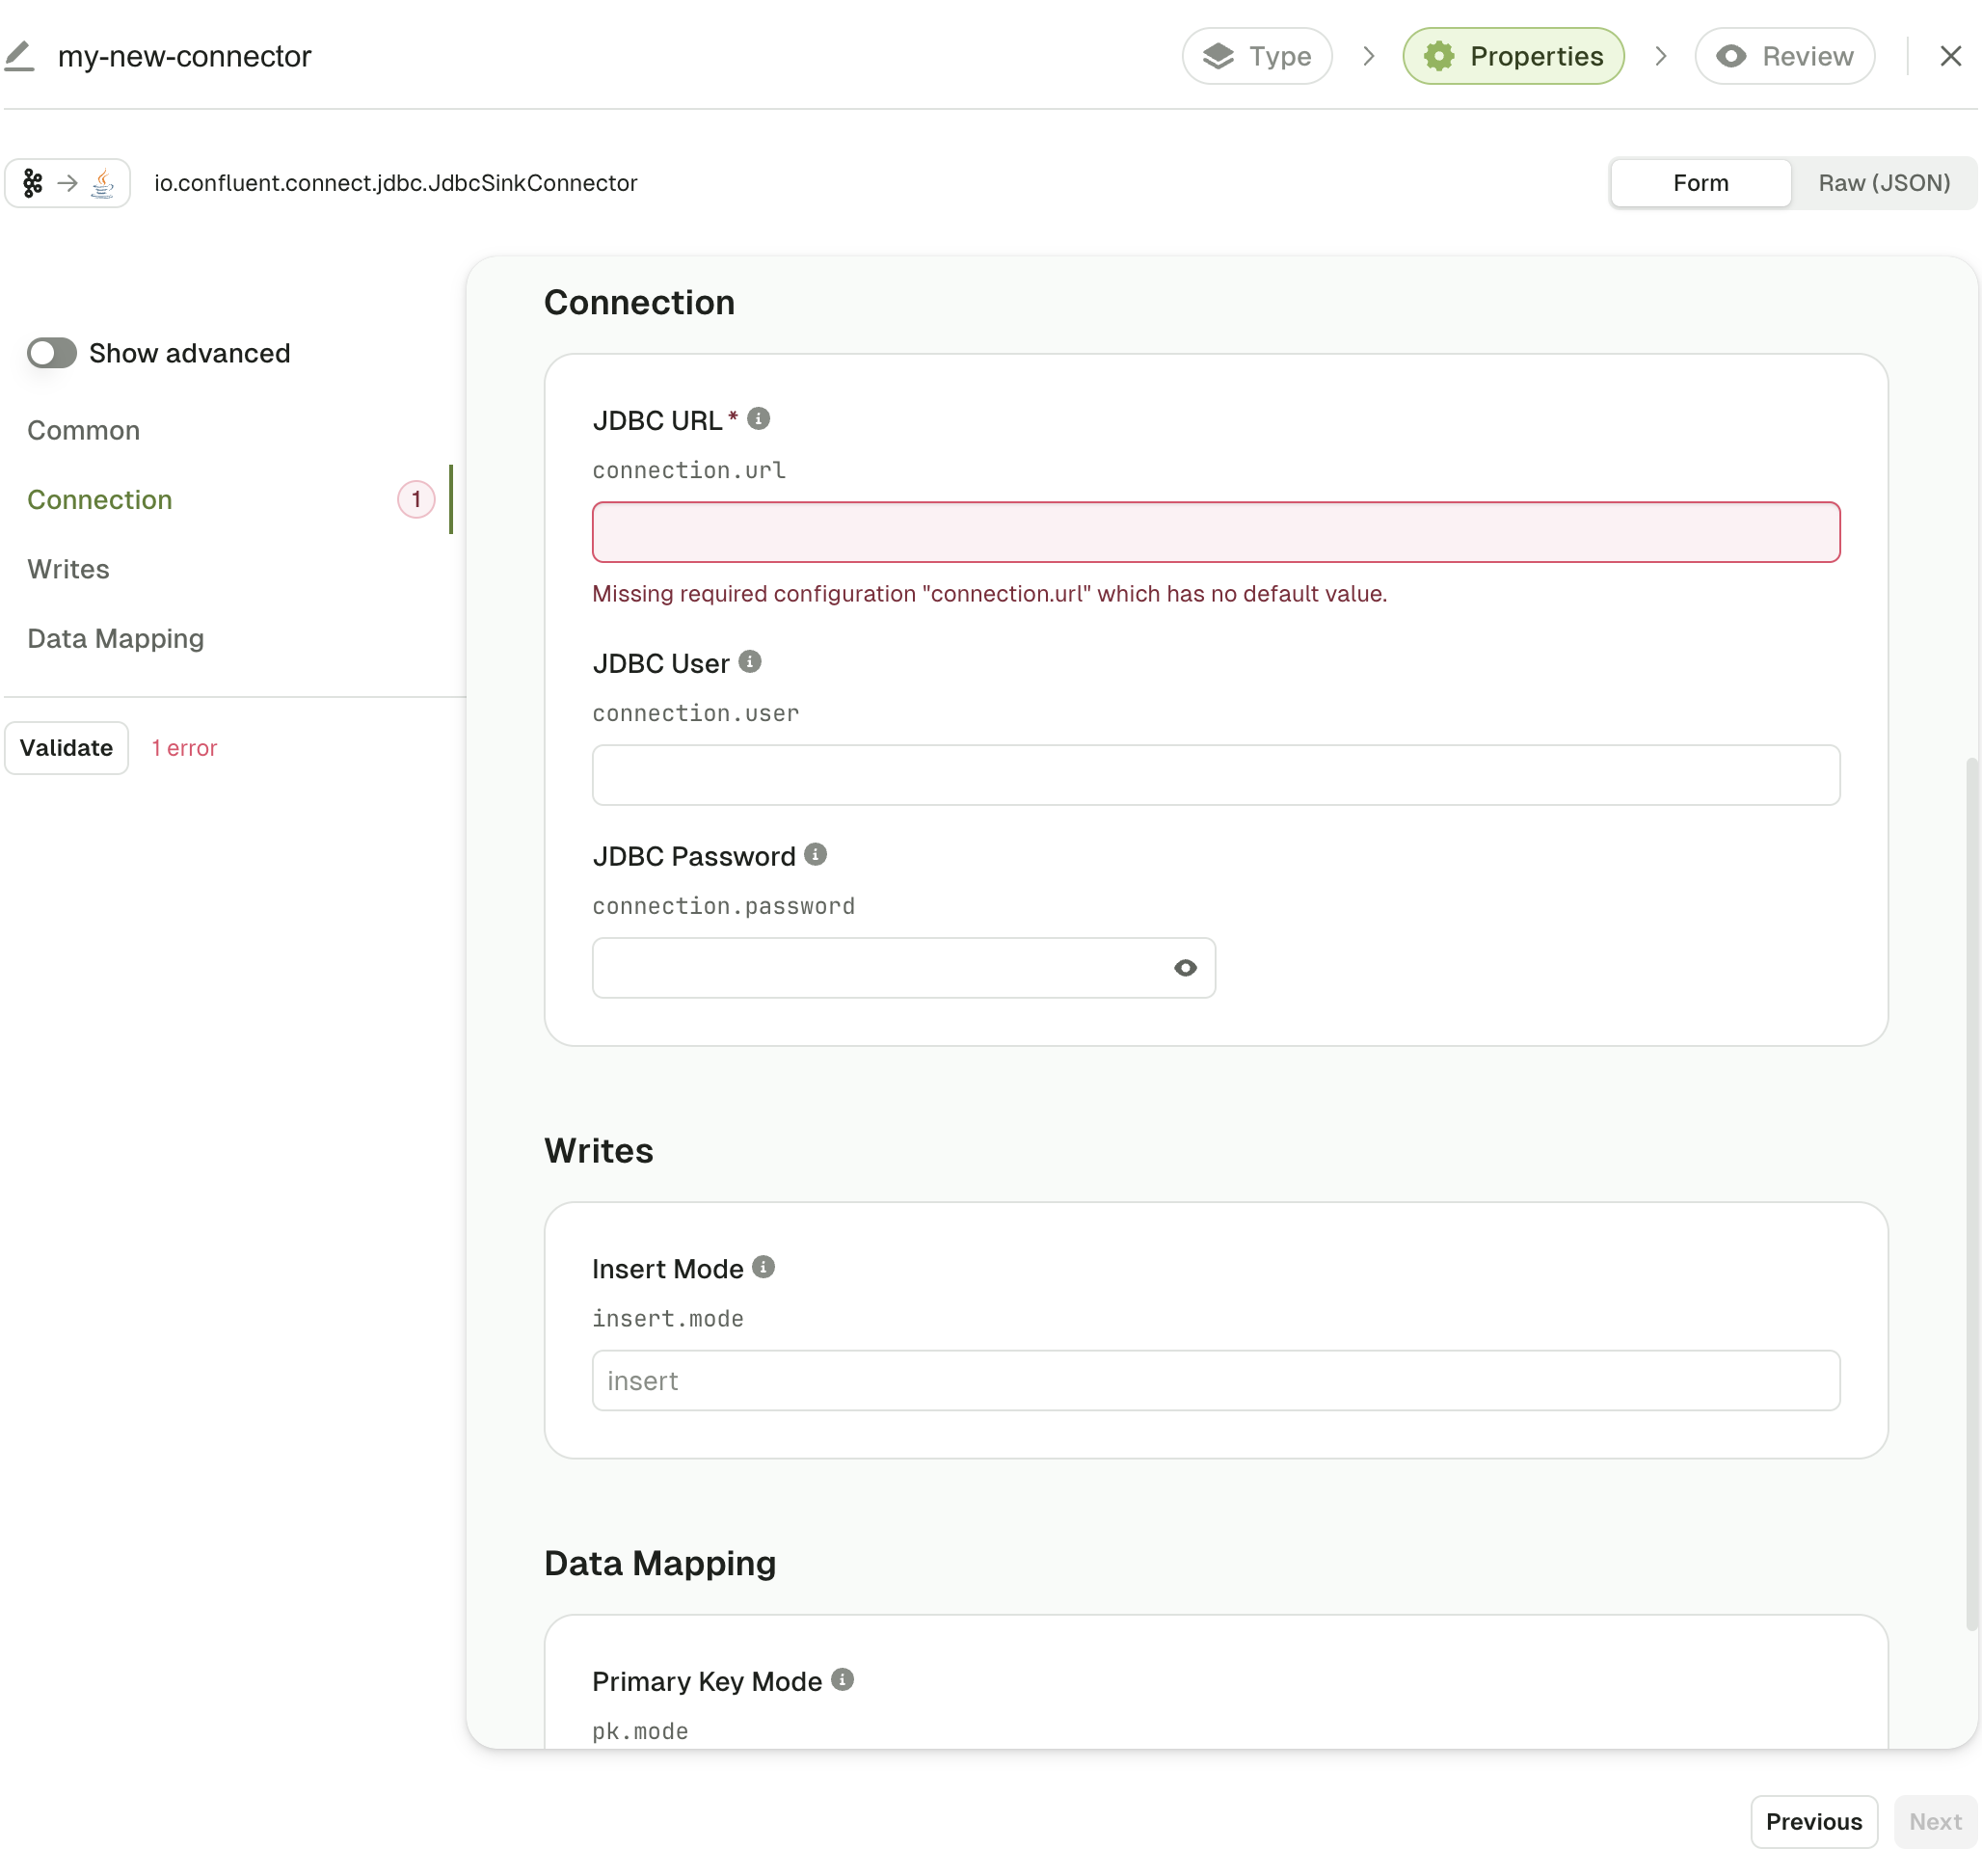
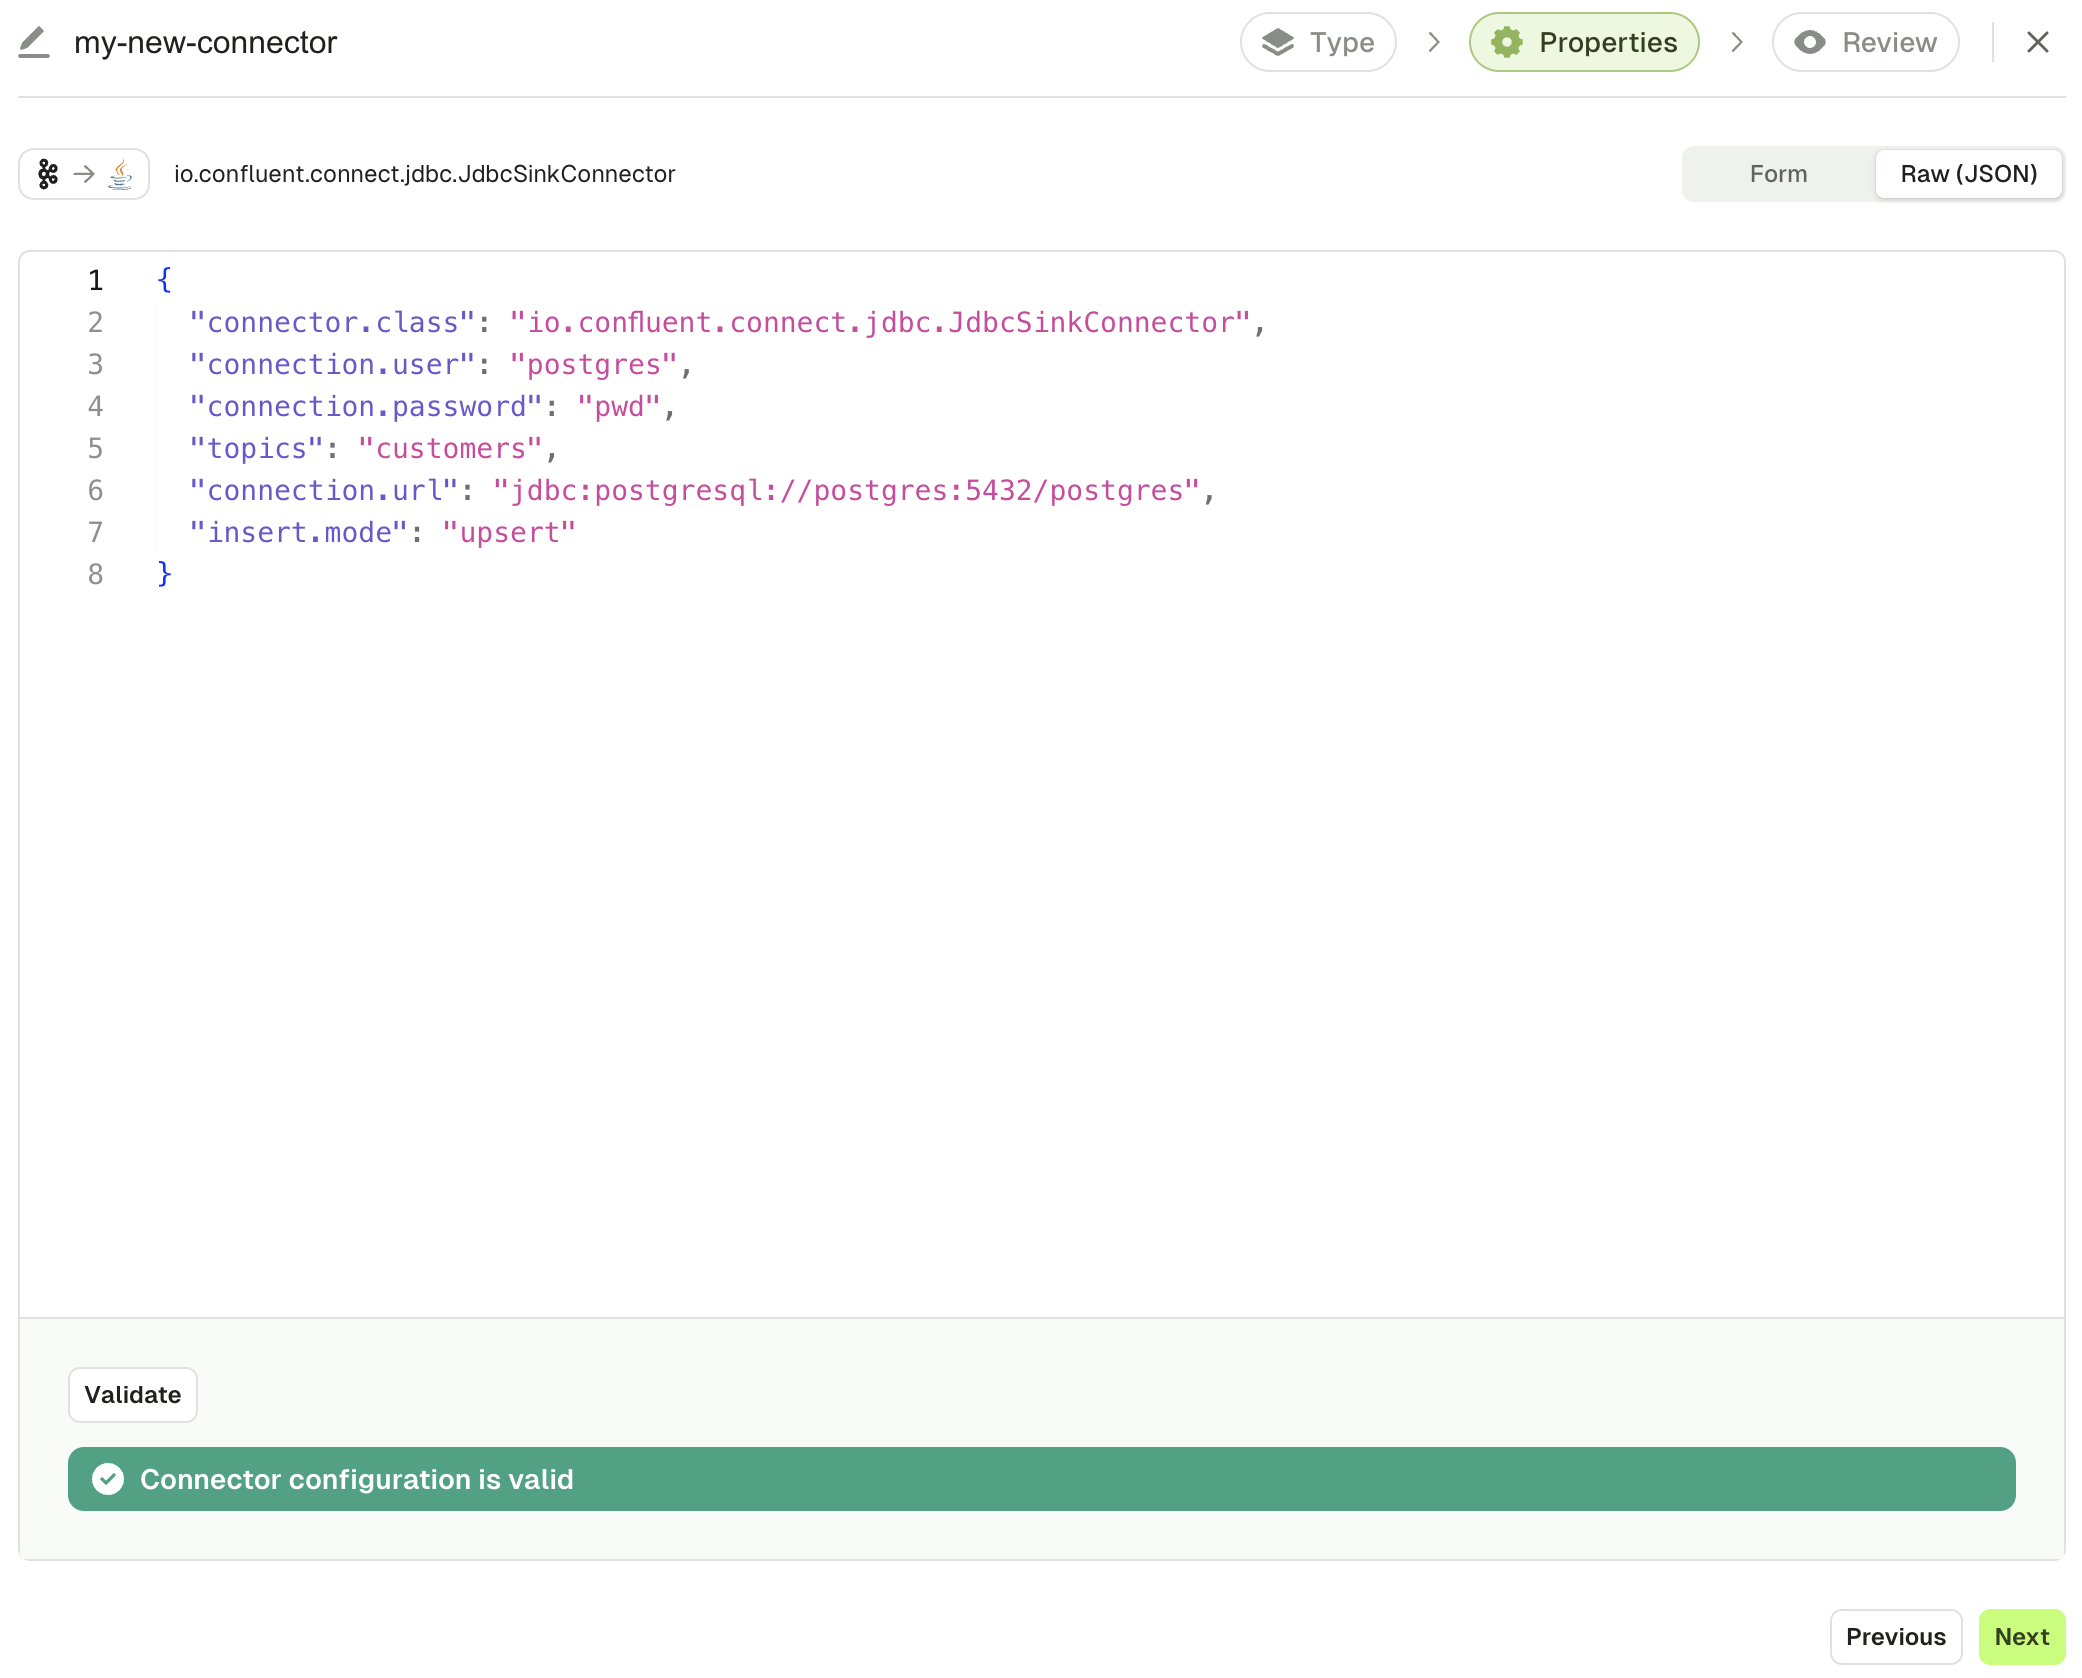
Configure your Connector to your convenience and use the Validate button to verify that your configuration is valid.
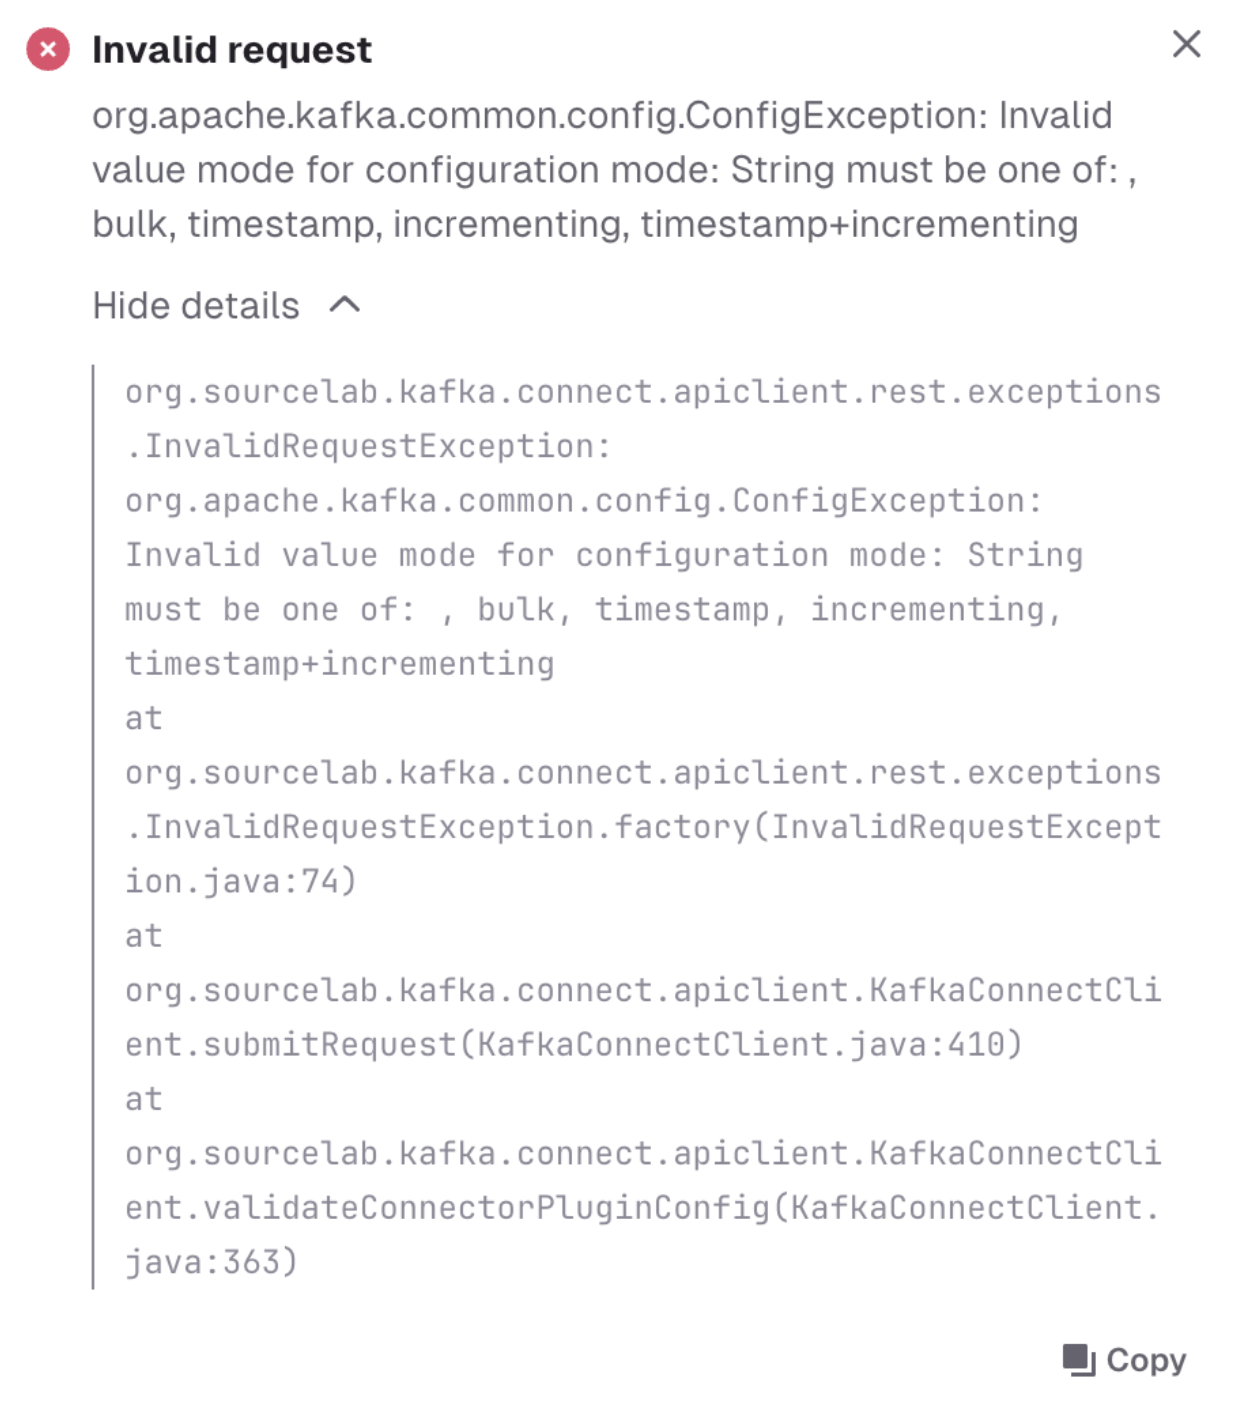
This will highlight the parts of the configuration that are invalid, and give you precise information on how to correct your Connector configuration.
While Kafka Connect Validate API generally checks for most configuration inconsistencies, there are some limits:
- It usually doesn't check for external configuration such as URL and user / passwords.
- Some Kafka Connect Plugins classes are notoriously badly implemented and don't take full advantage of Kafka Connect Validate API
When errors happen outside the nominal scope of Kafka Connect Validate API, you will see the errors as Toasts
At any point in time, you can switch to JSON view and edit the JSON payload directly.
You can switch back and forth between JSON and Form view at your convenience.
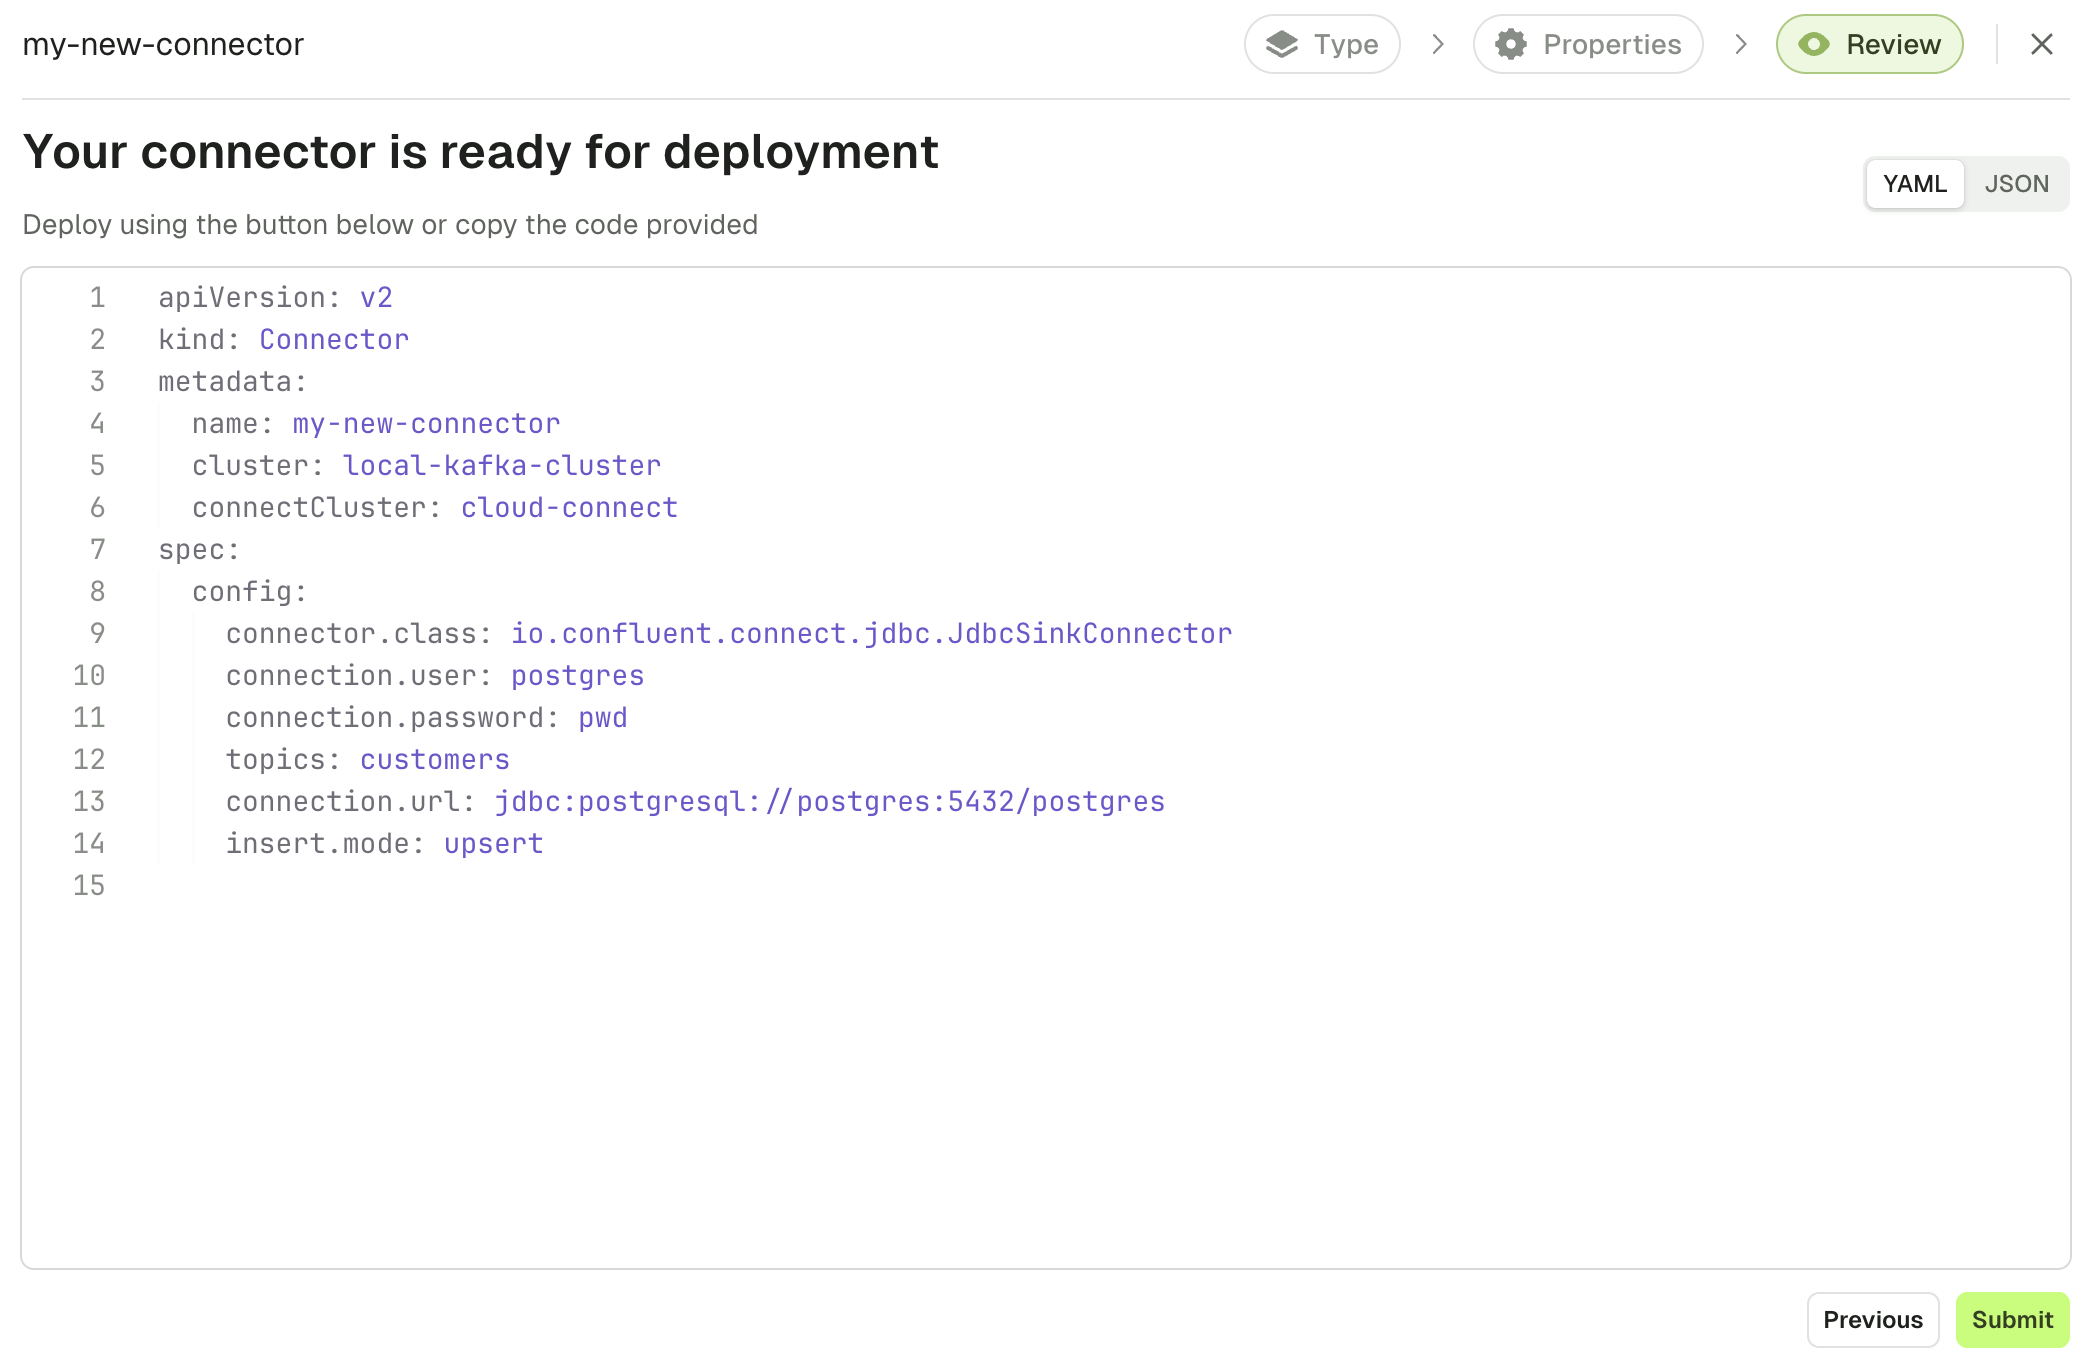
When you're done, click "Next" and you'll be presented with a Review screen where you will be able to copy the YAML associated to your Kafka Connect configuration.
This YAML will help you automate your deployment with the help of Conduktor CLI.
This is entirely optional and you can just deploy your Connector from the UI by clicking "Submit".
Connector overview
The Connector overview page is split into three sections:
- Statistics
- Graphs and alerts
- Task list
Statistics
This section gives you relevant information about the current state of your Connector that will stay visible across all tabs:
- Connector Status
- Connector Class
- Whether Auto-restart is enabled
- How many Topics are associated. You can click on the icon next to it to visualize their names

Operations
A few operations are available:
- Pause/Resume uses the Kafka Connect API to Pause or Resume the Connector
- Restart Connector restarts the Connector (not the tasks)
- Remove Connector deletes the Connector from the Kafka Connect Cluster
- You can also Refresh the list of topics used by that Connector. This is useful if your Connector is configured with
topics.regexand new topics were added recently- This makes use of the Kafka Connect Topics API
Graphs and alerts
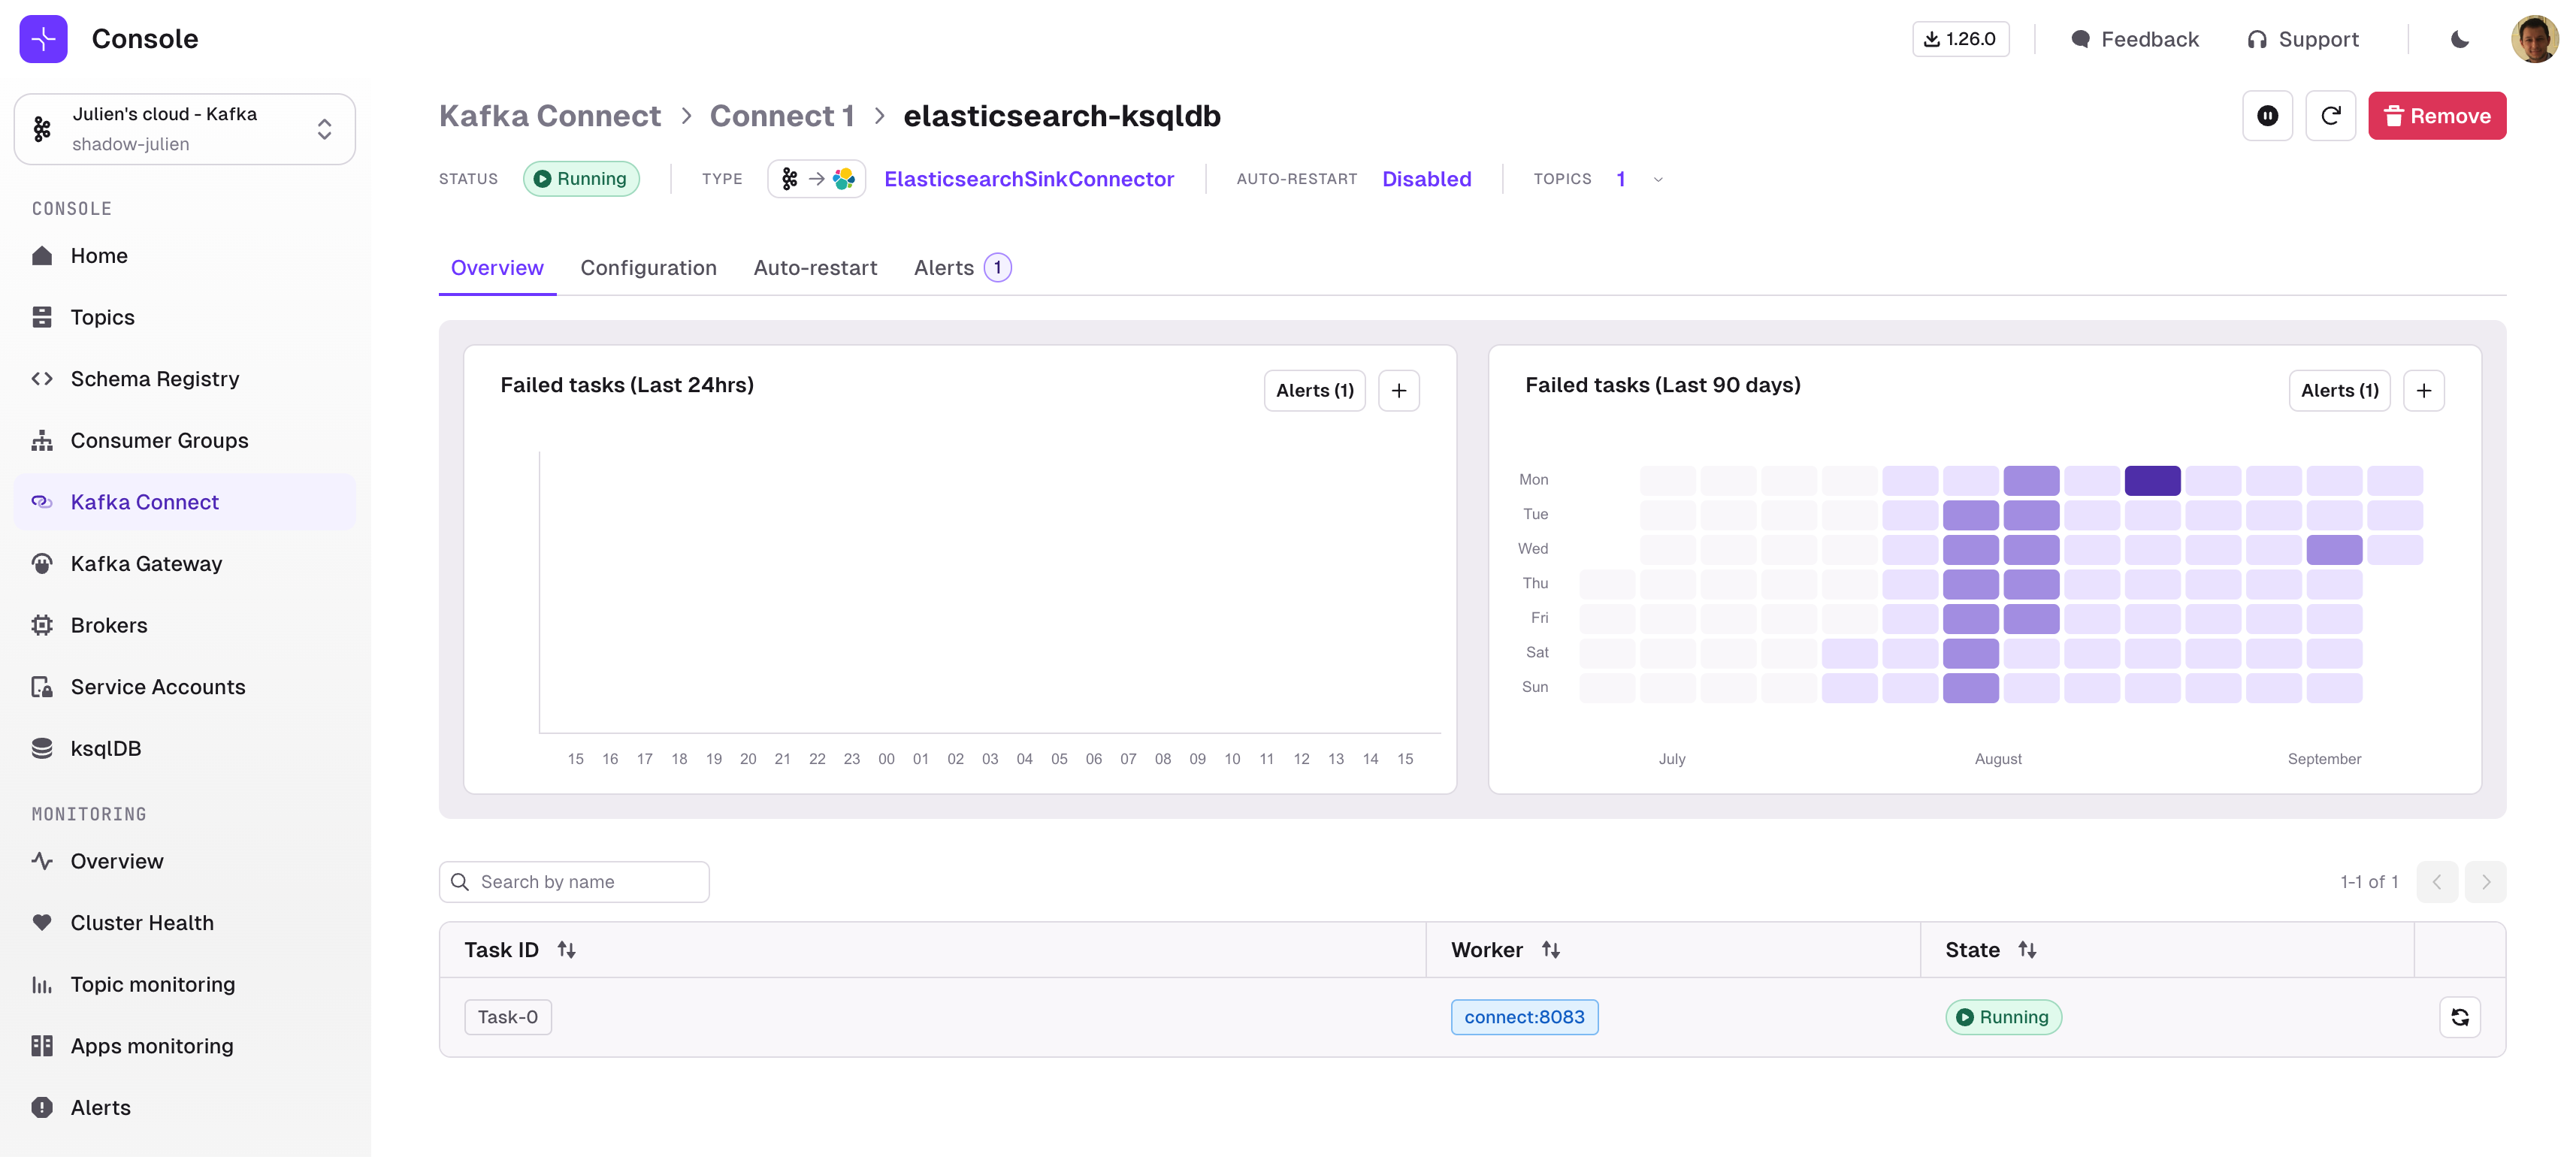
The Graph section lets you visualize the number of Failed Tasks of your Connector over the past 24 hours (Line chart on the left) or over the past 3 months (Heatmap on the right). This can help you understand if there is a specific pattern associated with your Kafka Connect Tasks failures.
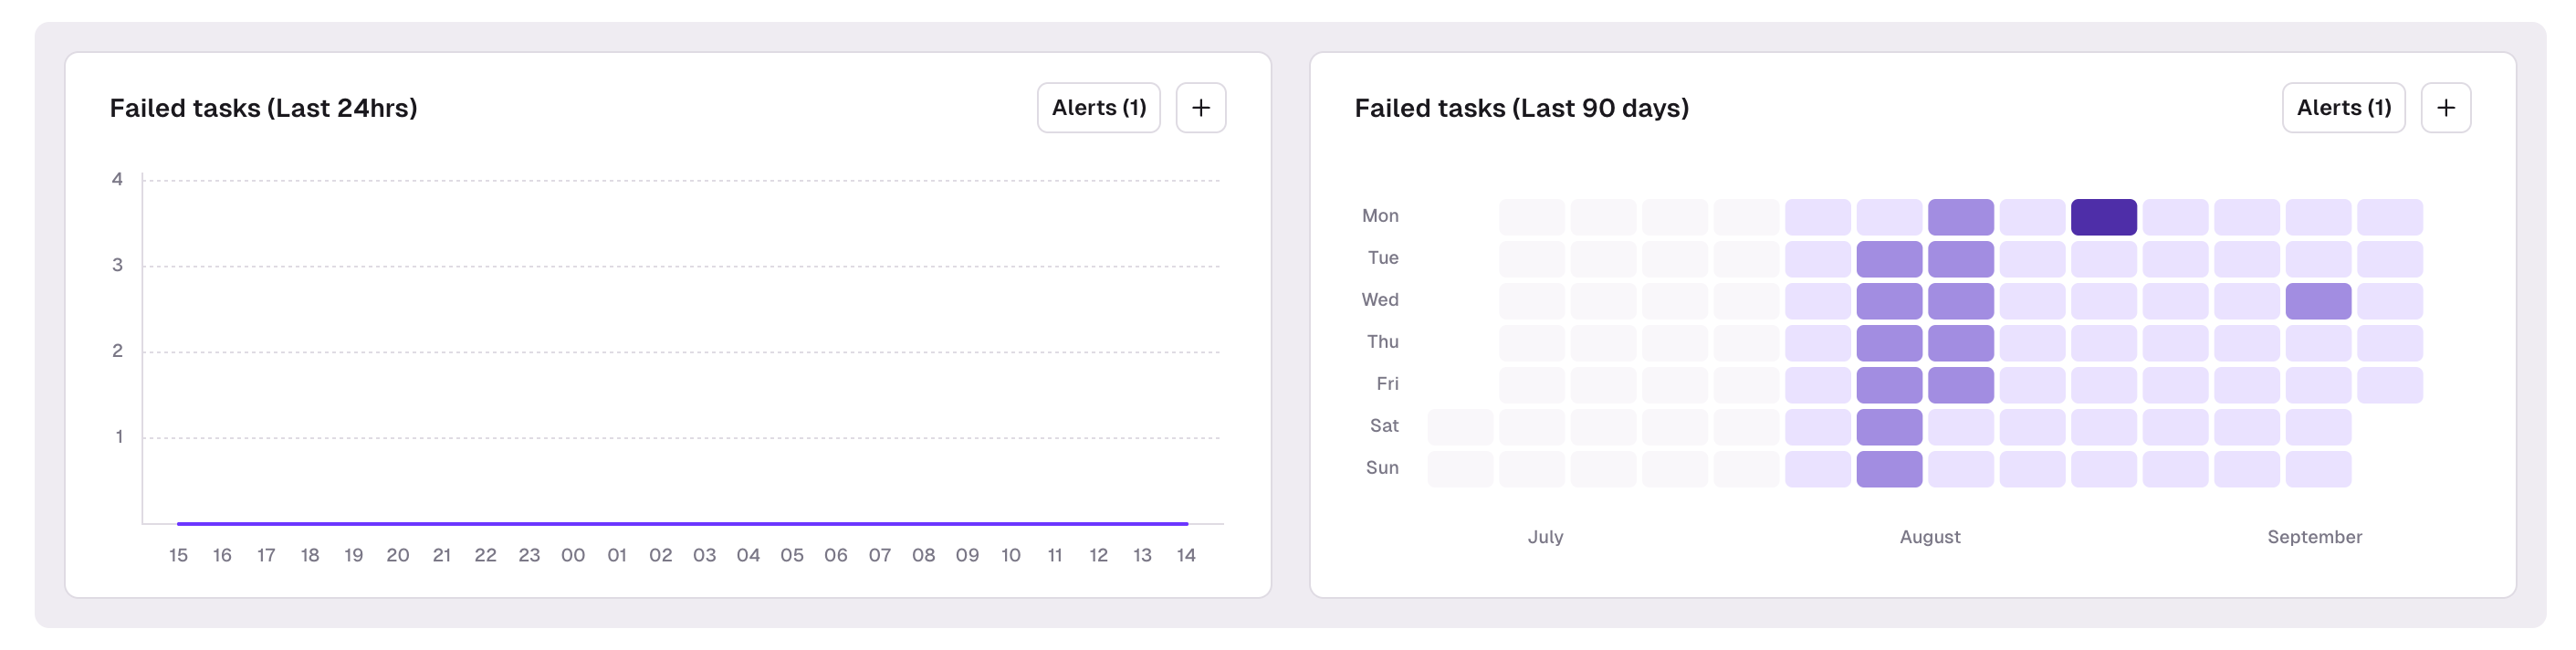
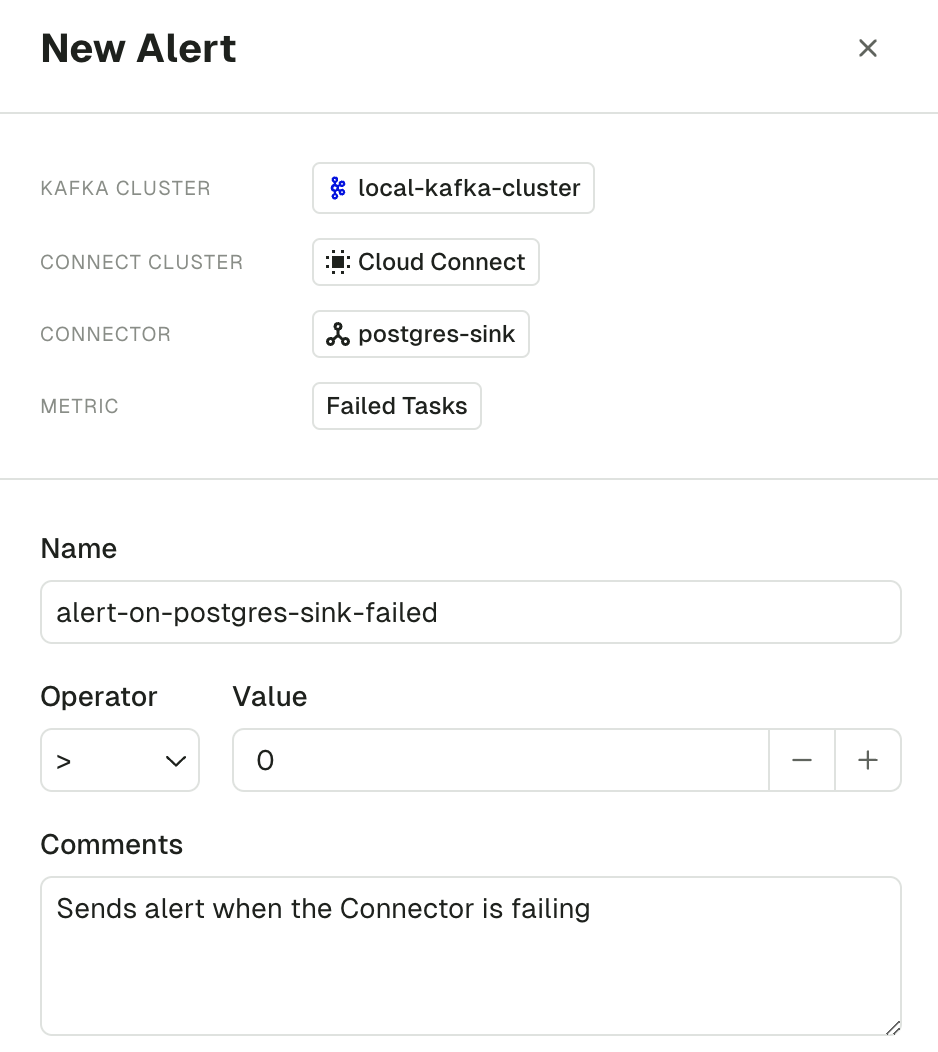
Create an alert
To create an Alert, click on the "+" button inside the graph to open the "Create Alert" page. There, define the threshold for your alert as well as a name, and click Save.
You can get a summary of all alerts associated to this Connector in the dedicated Alerts tab.
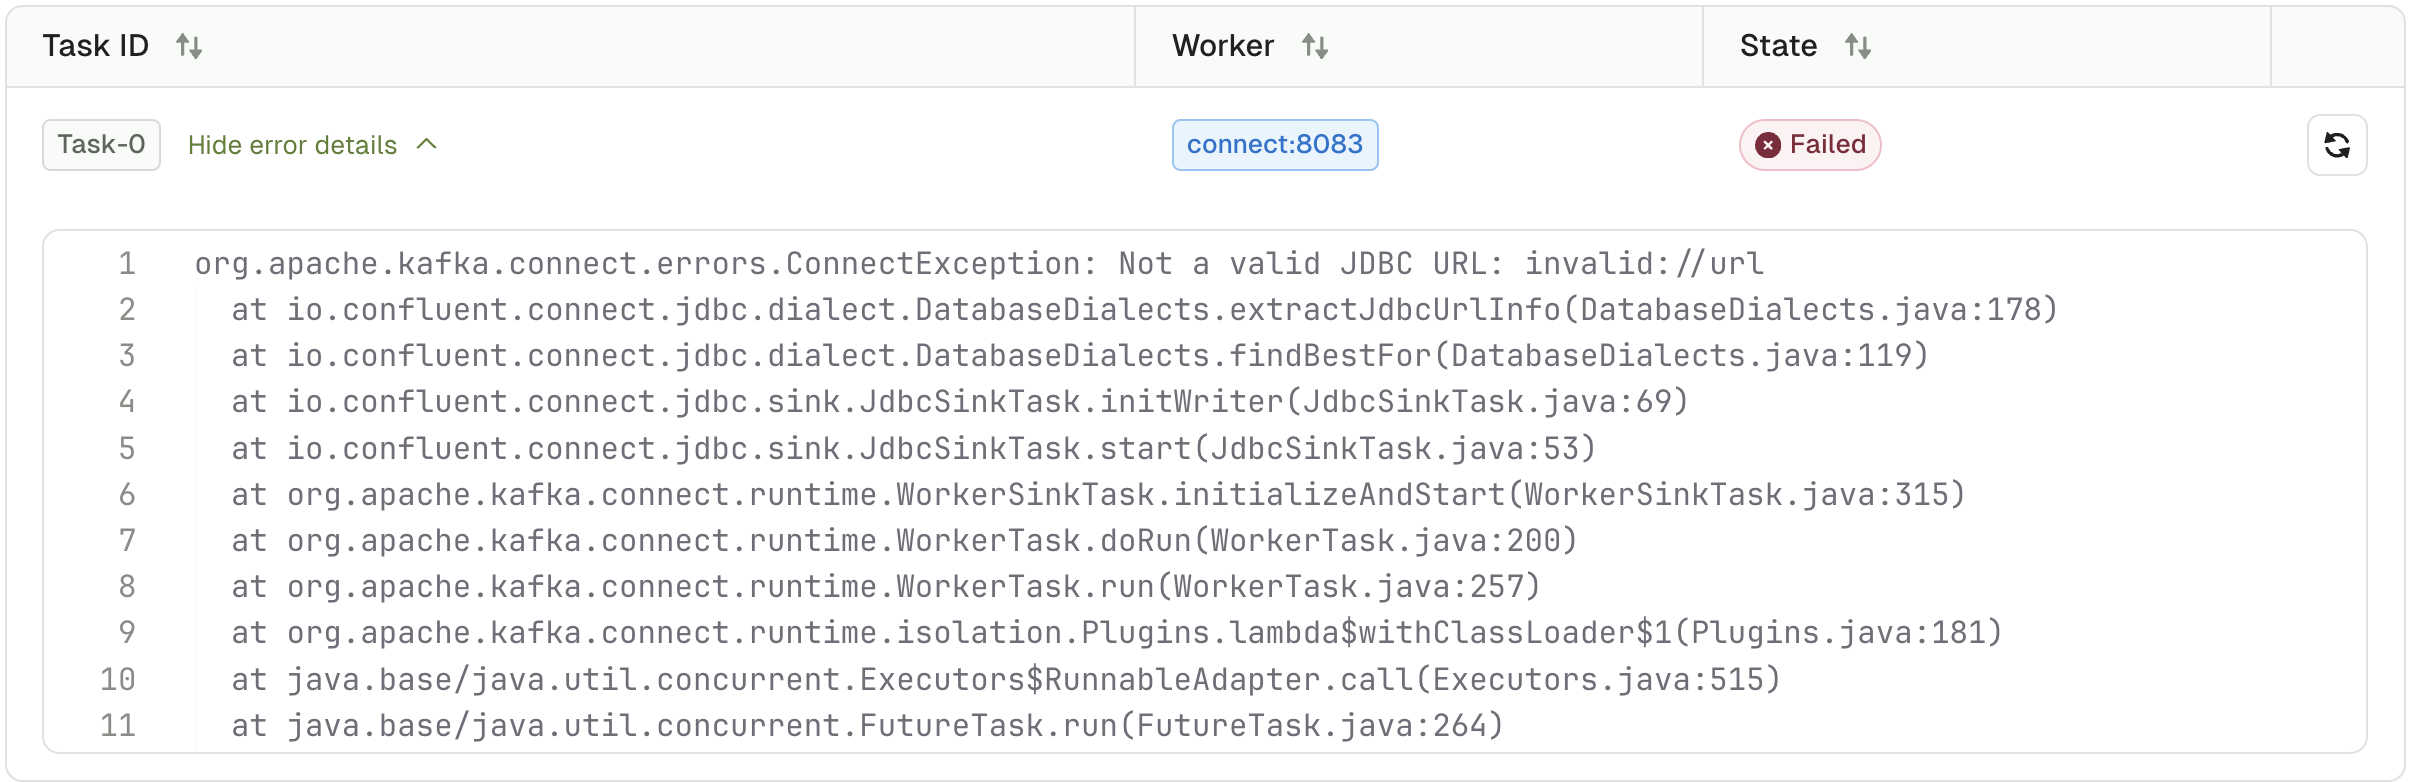
Task list
The task list displays all the information related to the tasks associated to the Connector:
- The task ID
- The Kafka Connect worker on which the task is running
- The current task state
- An option to Restart task
For Confluent Cloud Managed Connectors, the Restart task functionality will hit Confluent Cloud's restart connector API. This will restart the entire connector and all its associated tasks. This is the only publicly documented API that Confluent has exposed to achieve task restarts.
If a task is in a Failed state, you can see the detailed logs about the failed task.
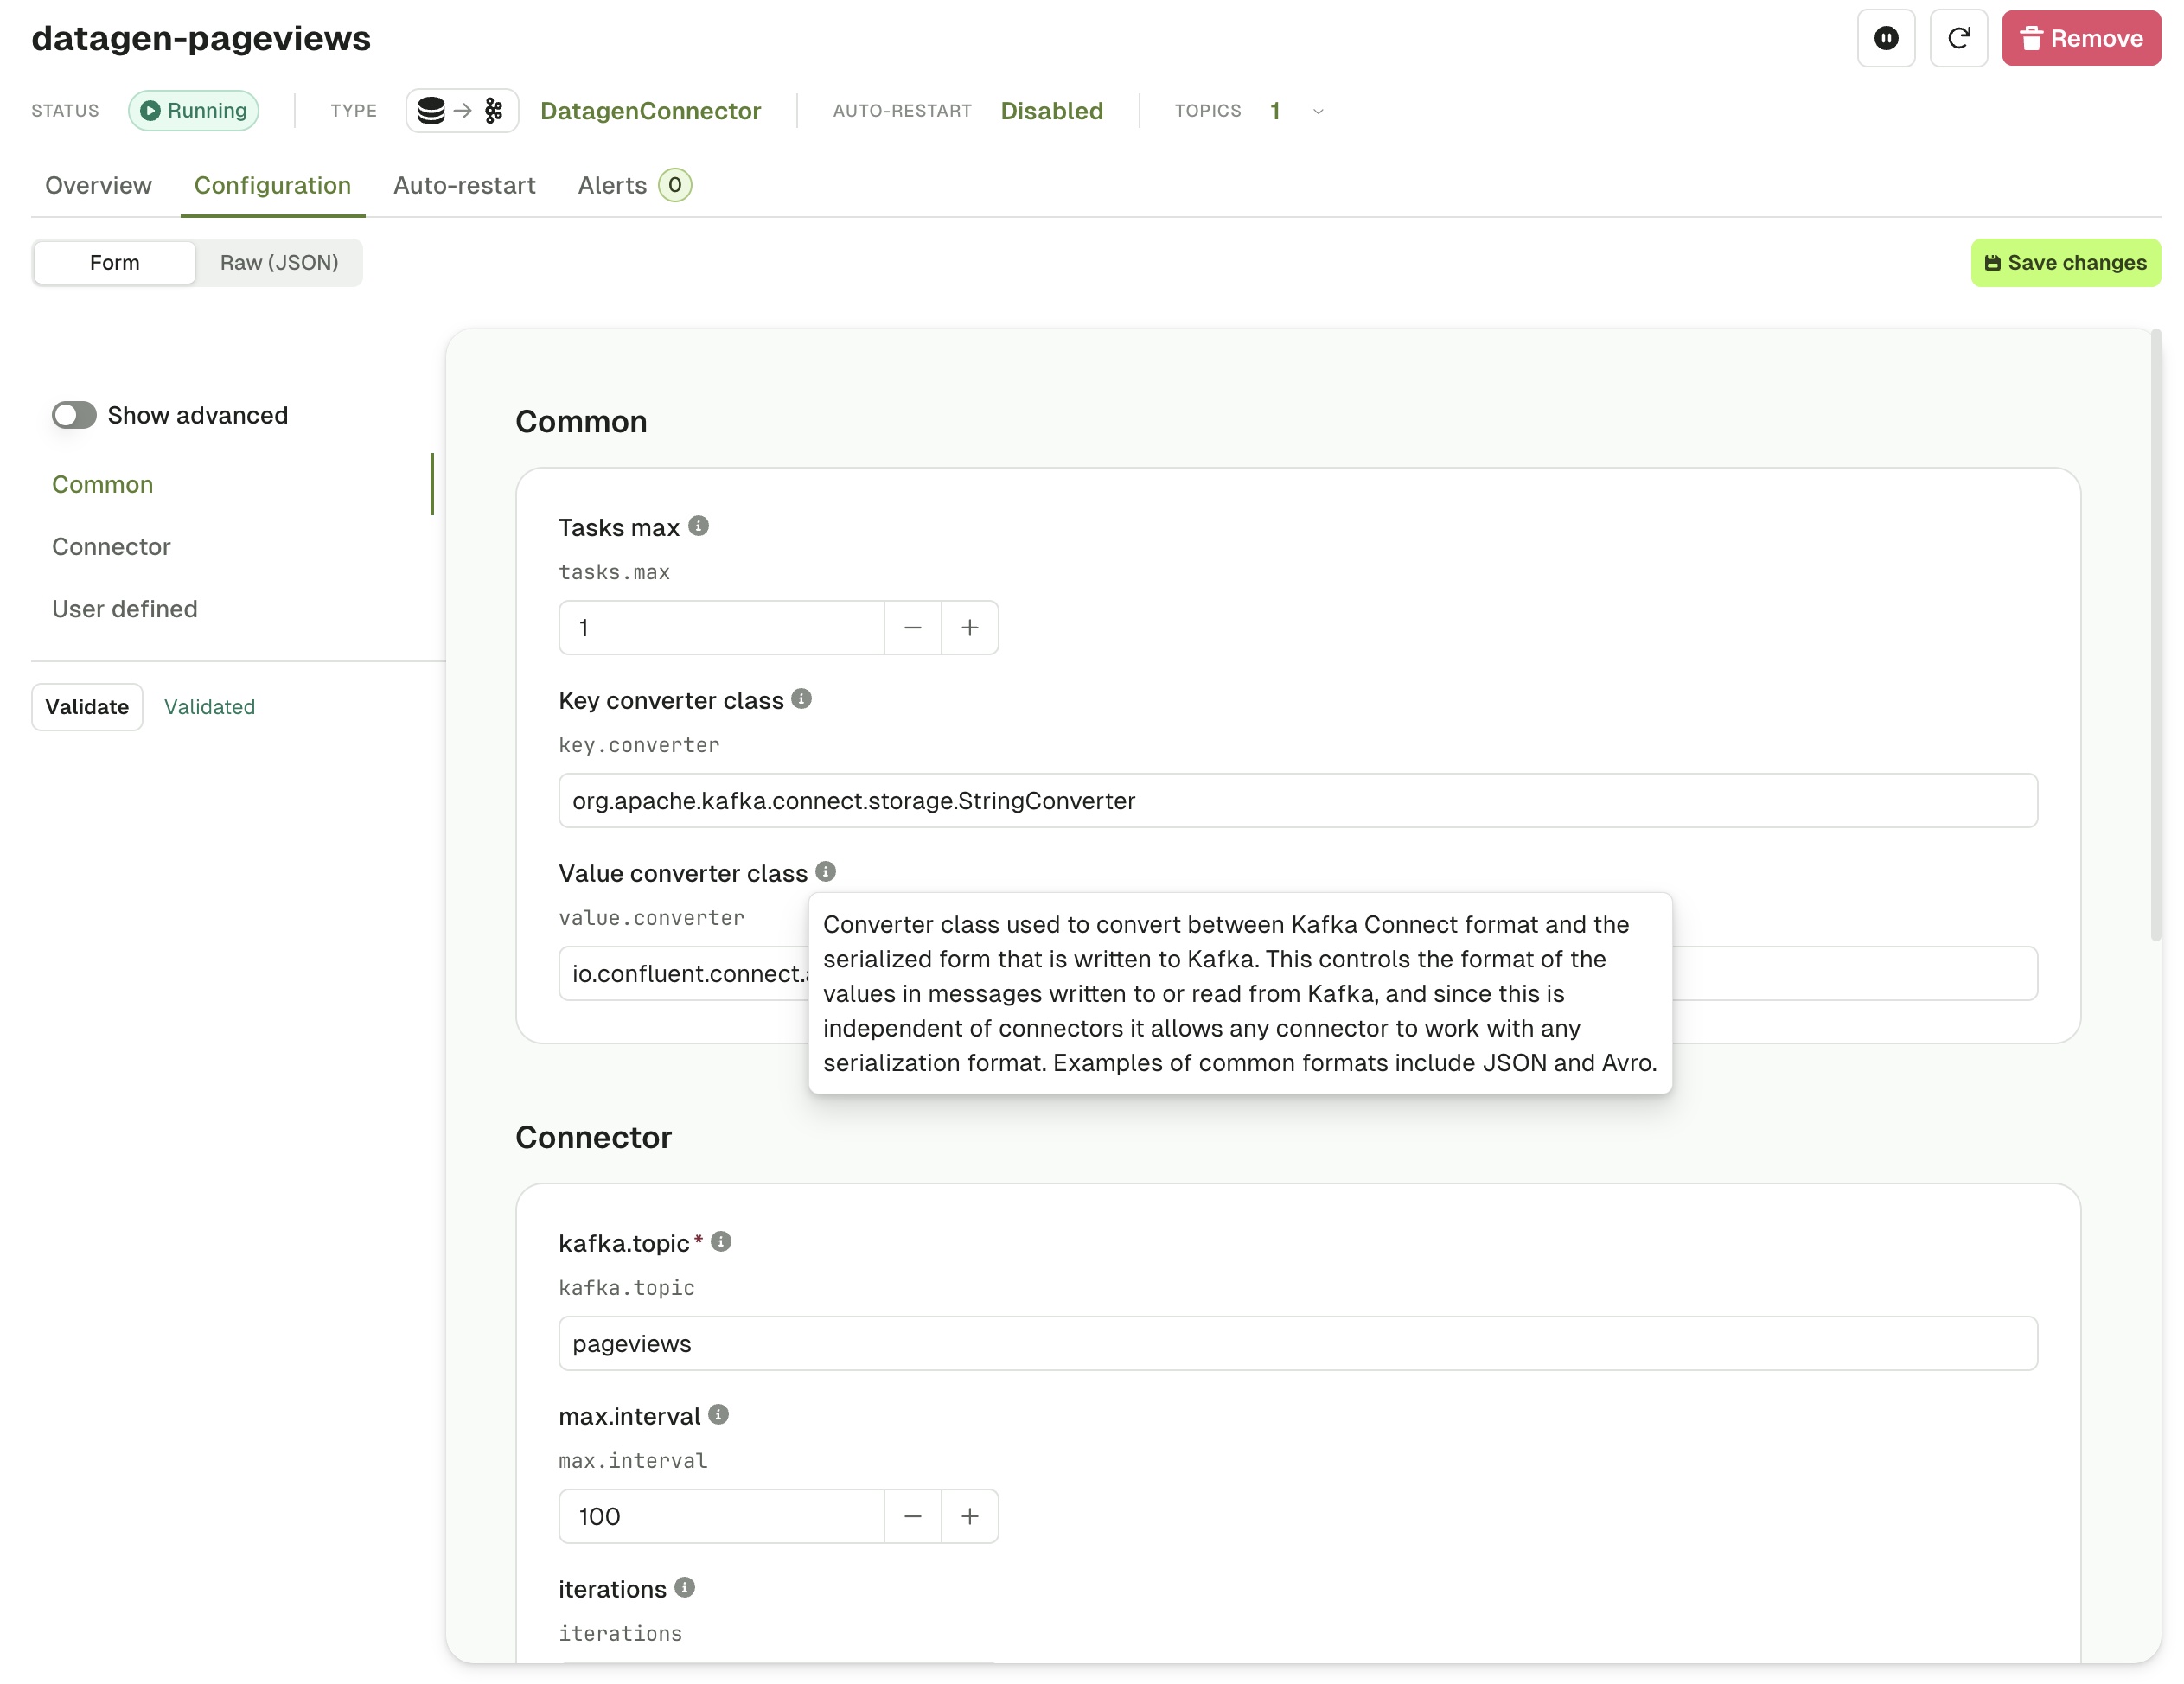
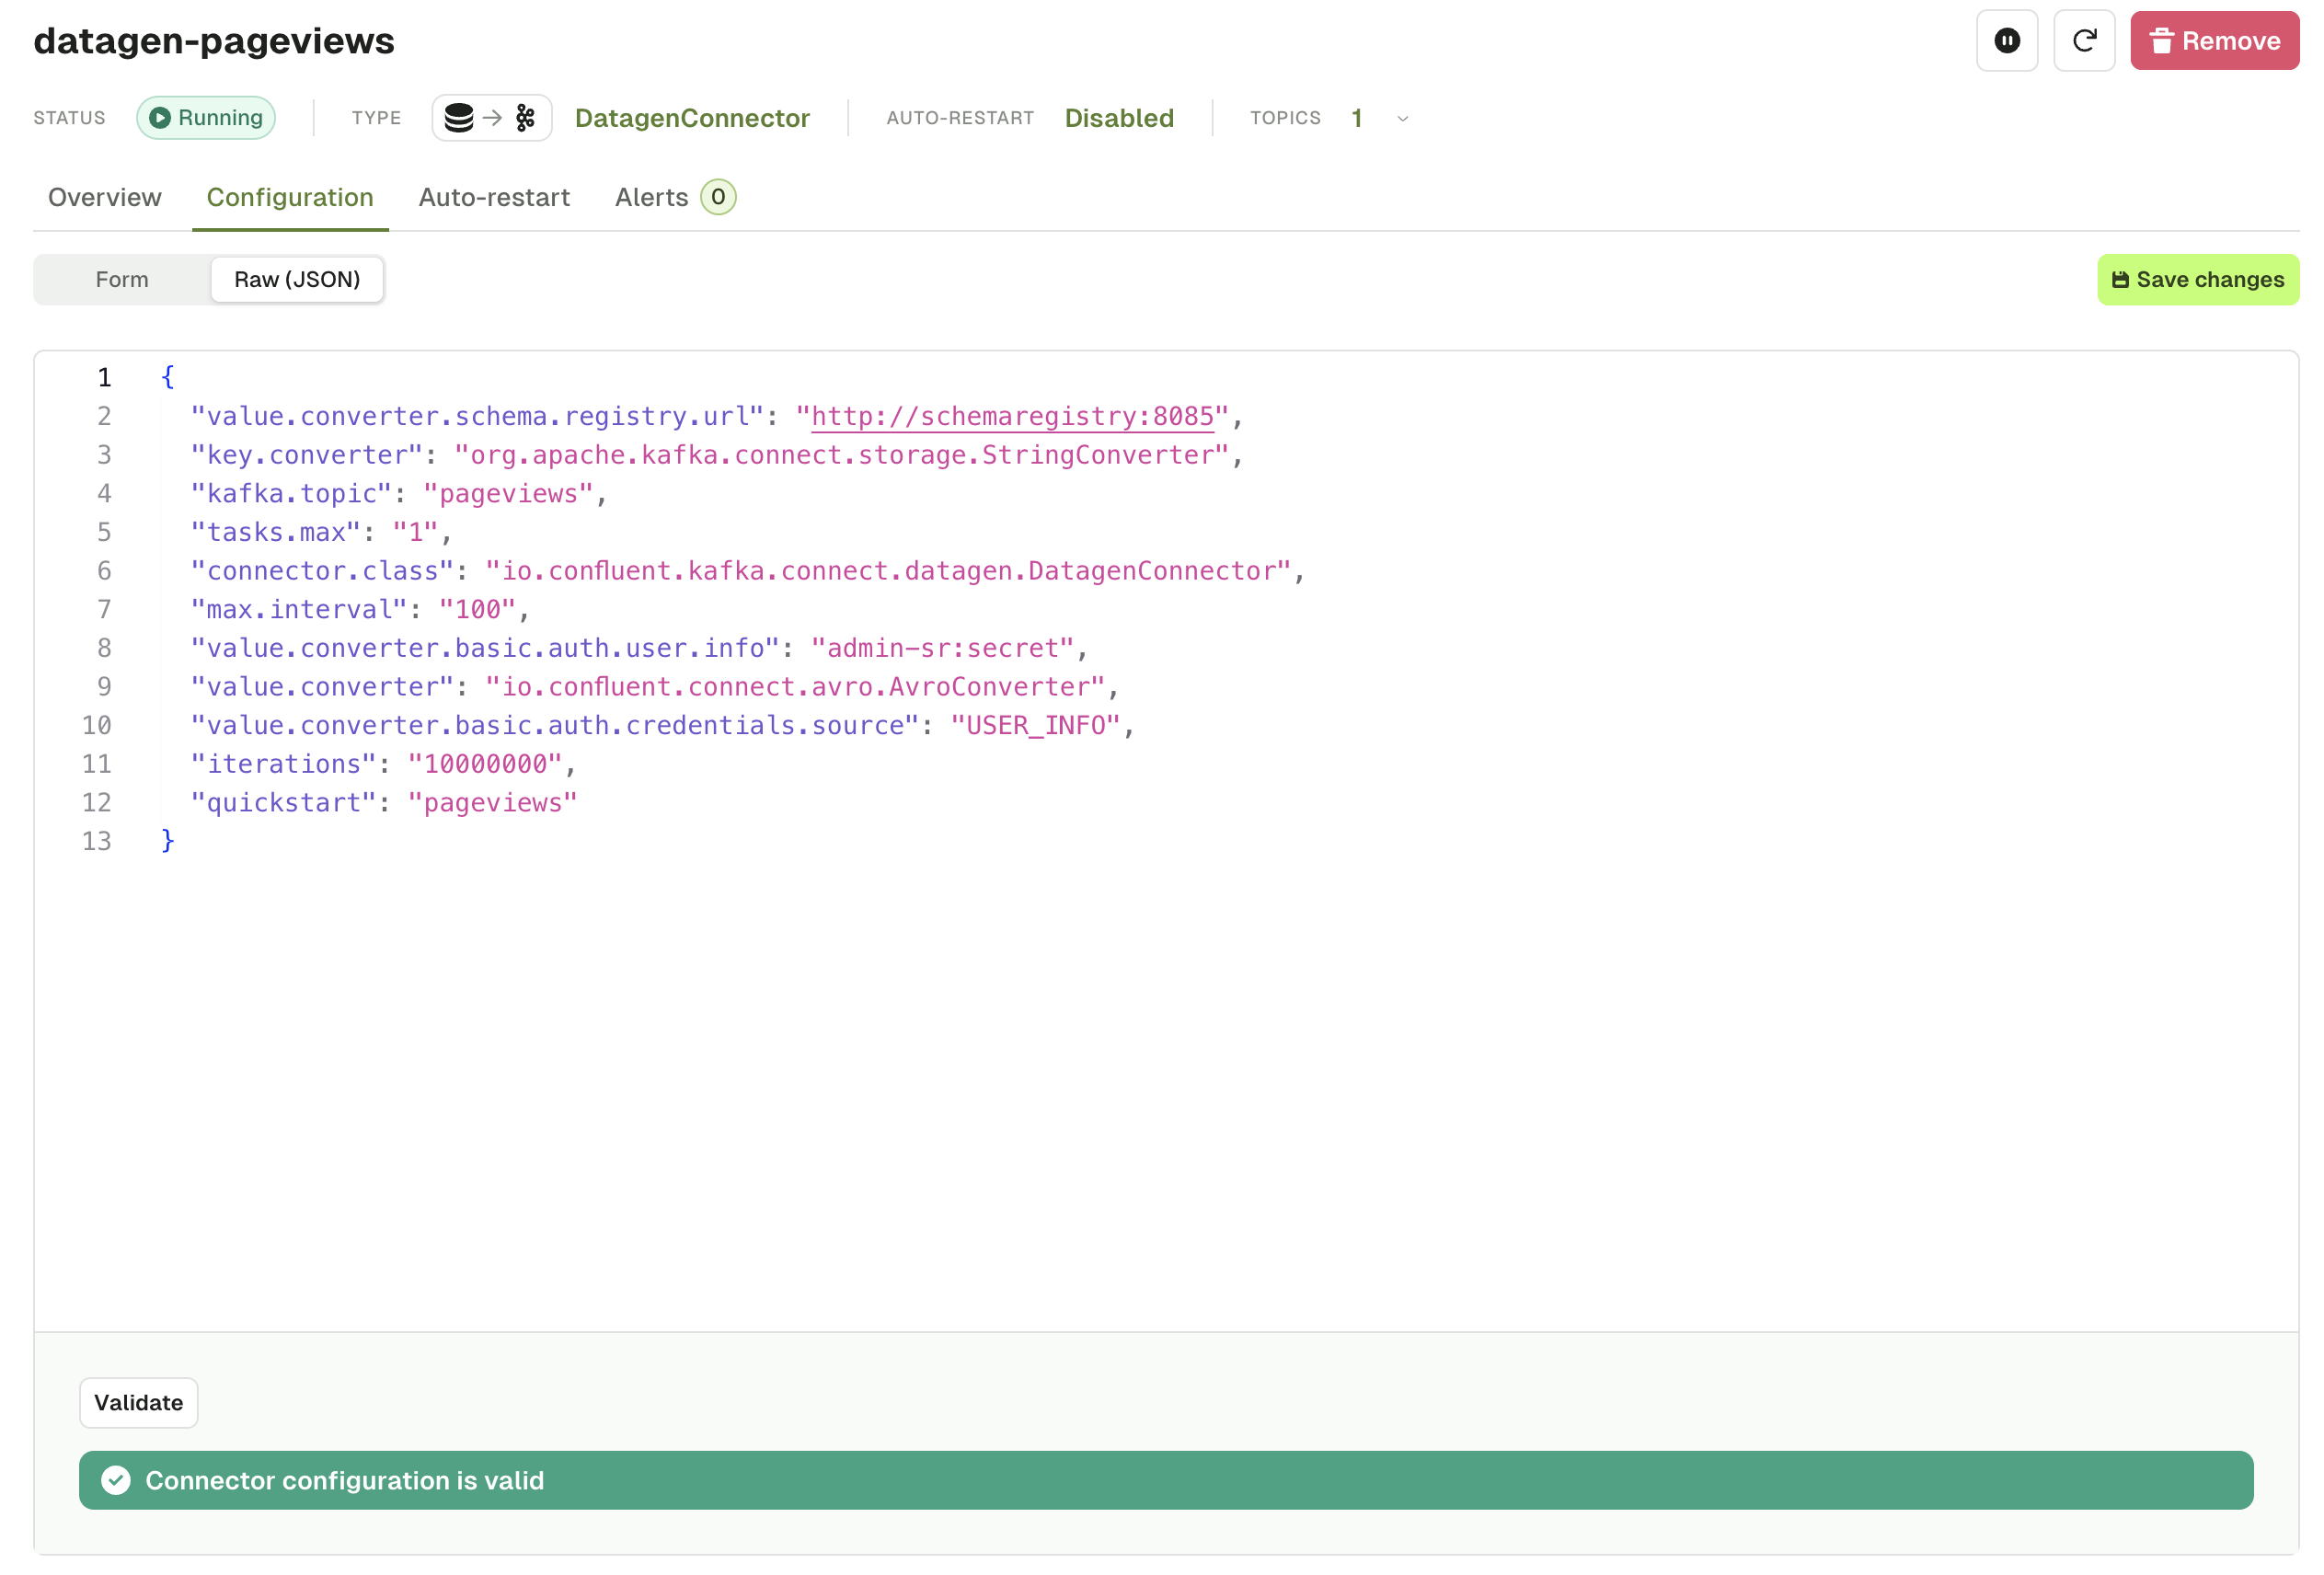
Connector configuration
Similar to the Create Connector workflow, the Connector Configuration tab lets you view or edit your Connector configuration using a wizard which is taking full advantage of the Kafka Connect Validate API:
- A form is generated with structured configuration groups to be filled out
- Supportive error handling is included with each individual field
- Embedded documentation helps you understand which fields are required and what their expected, and default, values are
- Toggle advanced configuration to visualize only the most important fields
- Switch seamlessly between Form View and JSON View at any time
The same configuration as a JSON:
Connector auto-restart
Sometimes, Kafka Connect tasks experience failures due to transient issues, database which isn't available for a few minutes or a networking issue, etc. When this happens, Kafka Connect tasks shut down and you need to manually start the tasks again.
Enable Auto-restart
Conduktor lets you enable Auto-restart on any connector instance. Once enabled, you can additionally configure the delay (default 10 minutes) between 2 consecutive restart attempts.
For Confluent Cloud Managed Connectors, the auto-restart functionality will hit Confluent Cloud's restart connector API. This will restart the entire connector and all its associated tasks. This is the only publicly documented API that Confluent has exposed to achieve task restarts.
How Auto-restart works
Every minute, Console will check for failed tasks for this Connector. For failed tasks:
- If the Auto-restart process hasn't tried to restart the task in the past 10 minutes (configurable):
- Capture the task error message
- Restart the failed task
- Otherwise, do nothing
Auto-restart history
You can review all the occurrences when Auto-restart triggered and the error message of the failed task before restarting.

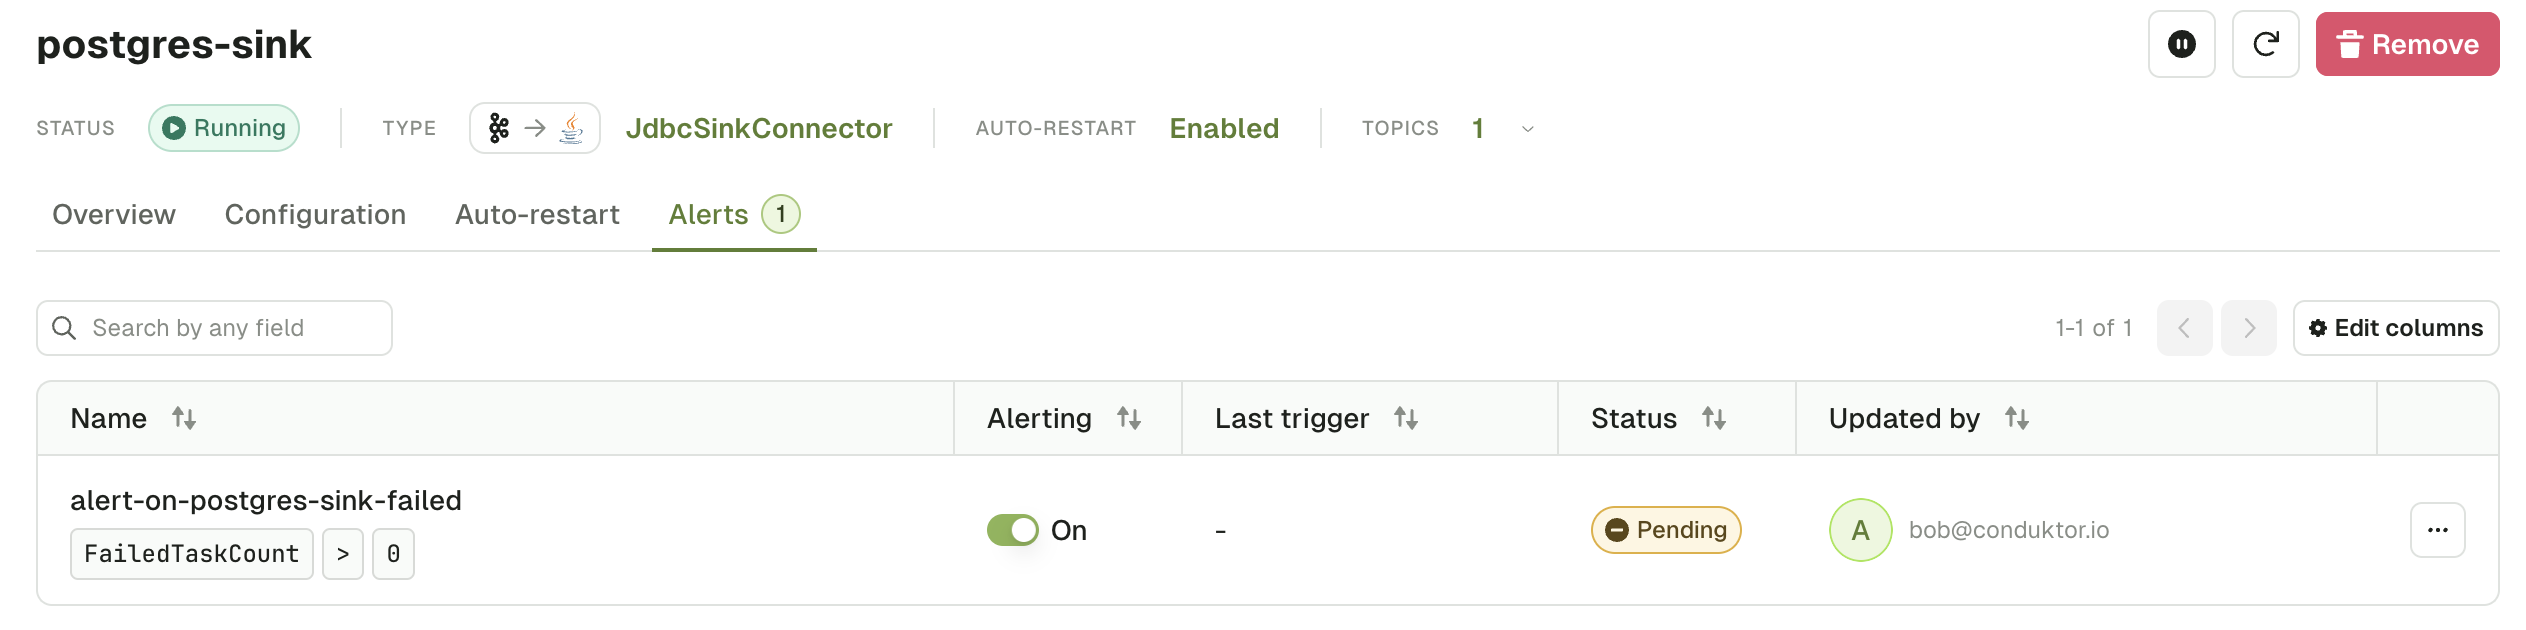
Connector alerts
The Connector Alert tab lets you visualize all active alerts associated to this Connector. You can edit them or, toggle them on or off.
Enable Confluent Cloud managed connectors
Generate an API key
In order for Conduktor to access a Kafka Connect, you need to generate an API key and secret to act as a username and password. This can be achieved through the Confluent Cloud CLI tool: ccloud. To install it, you can follow the official Confluent documentation.
Once installed, complete the following steps:
-
Login and select the appropriate environment:
$ ccloud login
$ ccloud environment -
Generate an API key and secret and write them down
$ ccloud api-key create --resource cloud
+---------+------------------------------------------------------------------+
| API Key | ABCDEFKZBF56666                                                  |
| Secret  | ToMaHaWkjQ1bt7BxvdyFjaJ8j3nSokaAd83Nhan739snAiufIAfdk7fFAAnBKxai |
+---------+------------------------------------------------------------------+ -
The API key is the username, the secret is the token. Store these somewhere as we will need them later in the process.
Obtaining your environment and cluster identifiers
Now we need to obtain the identifiers of the environment and cluster.
- Retrieving the ID of your environment can be achieved through the
ccloud environment listcommand.
$ ccloud environment list
      Id      |    Name
+-------------+------------+
    env-1234 | staging
  * env-6789 | production
In this scenario, the environment ID for the production cluster would be env-6789.
- Retrieving the ID of your Kafka cluster can be achieved from the
ccloud kafka cluster listcommand.
 ccloud environment use env-6789
 ccloud kafka cluster list                                                                    16:21:10
      Id      |         Name         | Type  | Provider |    Region    | Availability | Status
+-------------+----------------------+-------+----------+--------------+--------------+--------+
    lkc-8888 | analytics-production | BASIC | gcp      | europe-west4 | single-zone  | UP
In this scenario, the ID of the cluster would be lkc-8888.
Building the Kafka connection URL
With your obtained environment and cluster IDs, build the URL as so:
https://api.confluent.cloud/connect/v1/environments/${ENVIRONMENT_ID}/clusters/${CLUSTER_ID}/
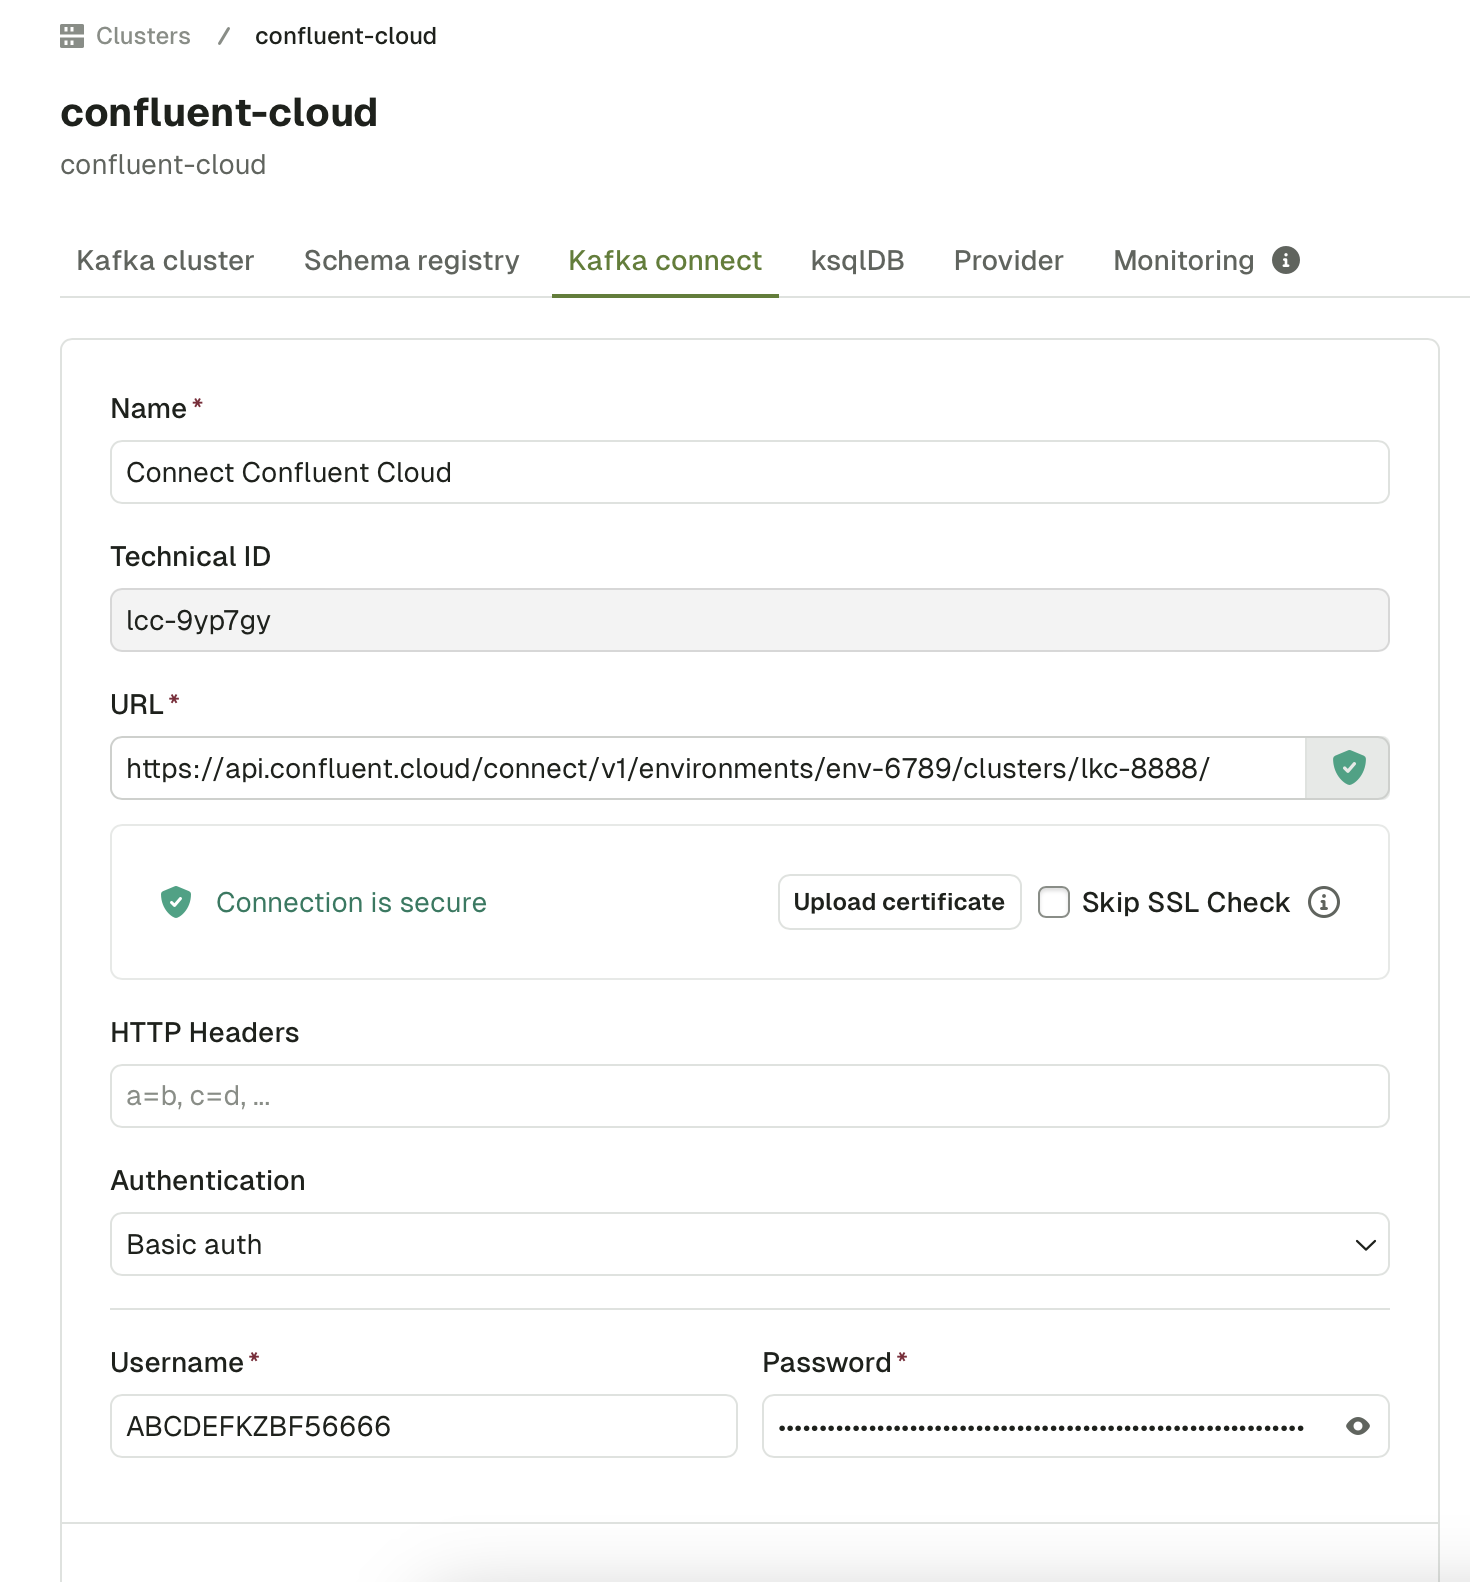
Populating the configuration information in Conduktor console
Navigate to cluster settings and go to the 'Kafka connect' tab. Once there, fill in the form with the following information:
- Technical ID: The cluster ID you have obtained
- URL: The Kafka connection URL you have built
- Authentication: Basic auth
- Username: The API key you have generated
- Password: The token you have generated.